Opening a Jupyter notebook from GitHub in Binder: A step-by-step guide
Jupyter notebooks have become an essential tool for data scientists and researchers, allowing them to combine code, visualizations, and explanations seamlessly. GitHub, a popular platform for code collaboration and version control, hosts numerous Jupyter notebooks that are shared by the community. In this blog post, we explore how to open a Jupyter notebook from GitHub directly in Binder, a cloud-based service for running interactive notebooks. By following these simple steps, you can quickly access and interact with Jupyter notebooks without the need for any local installations.
 The Binder logo.
Step-by-step guide
Step 1: Locating the desired notebook on GitHub
Begin by navigating to GitHubꜛ and search for the repository containing the notebook you wish to open. Once you find the repository, make sure you are on the repository’s main page.
Step 2: Copying the repository URL
Locate the green “Code” button on the repository page and click on it. A dropdown menu will appear, providing you with a URL. Click the clipboard icon next to the URL to copy it.
Step 3: Opening the notebook in Binder
Now, open a new browser tab and visit the Binder websiteꜛ. The Binder homepage will present you with a simple interface.
Step 4: Pasting the repository URL in Binder
In the “GitHub repository name or URL” field on the Binder homepage, paste the URL you copied in Step 2. Make sure to paste the entire URL accurately.
Step 5: Configuring Binder
By default, Binder will attempt to detect the environment needed to run the notebook automatically. However, you can further customize the environment if desired by providing a specific branch, tag, or commit. This step is optional, but it allows you to ensure the notebook runs with specific dependencies or versions.
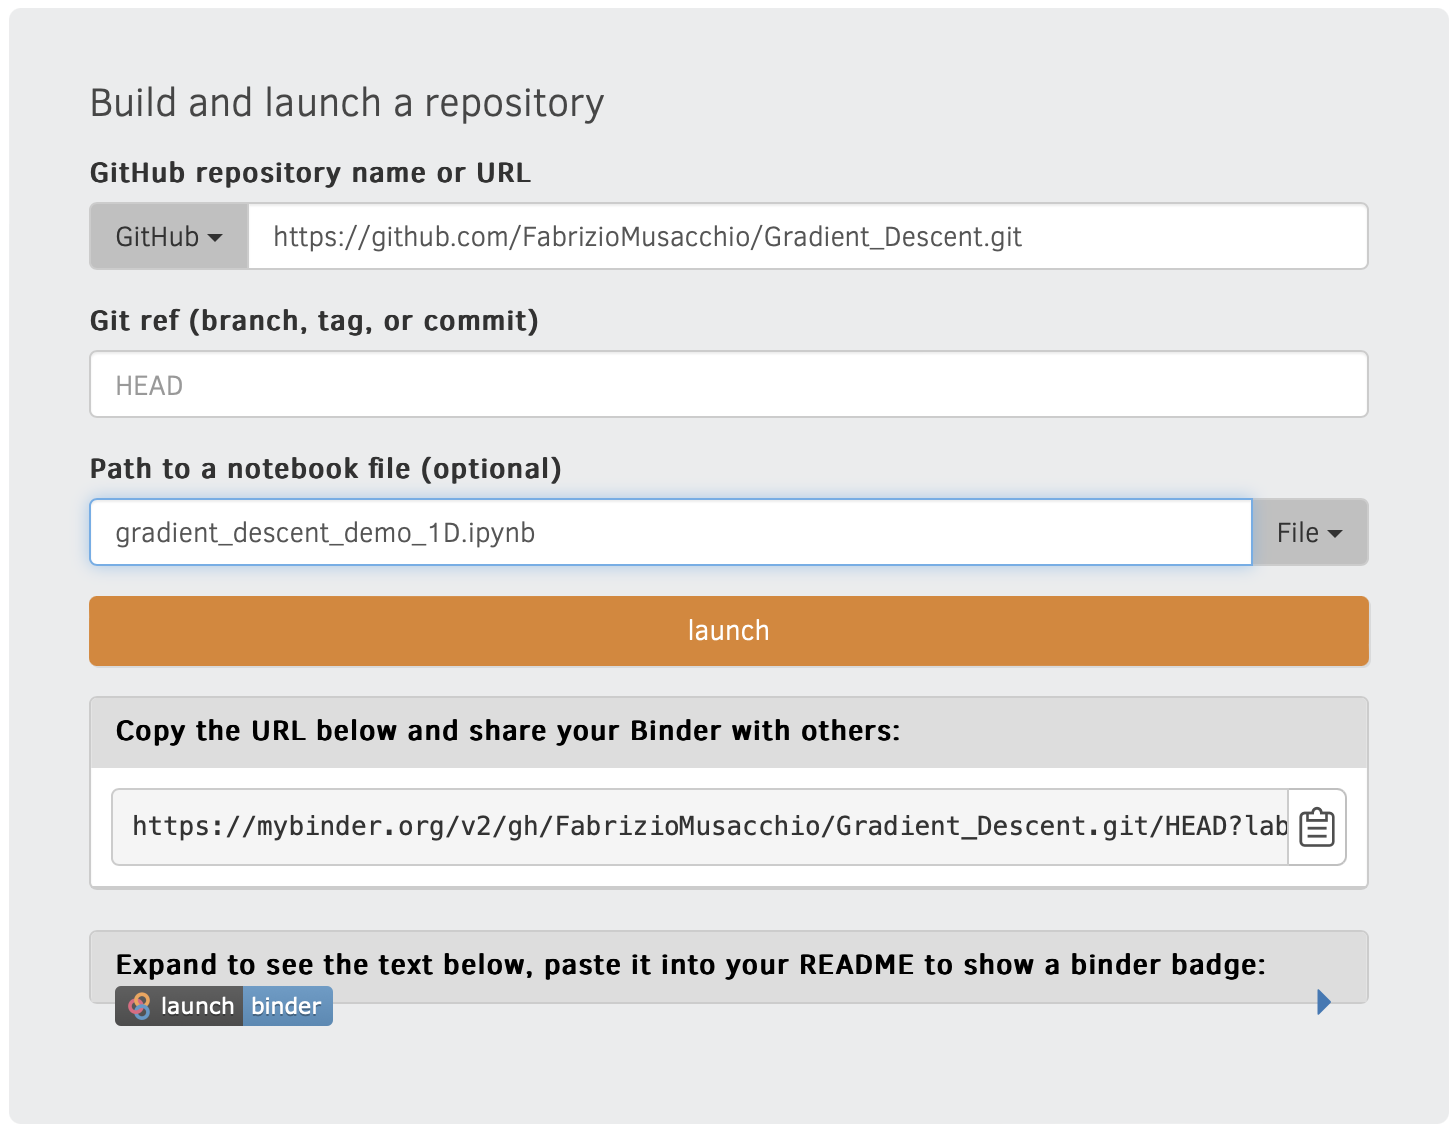
To open a specific notebook of the repository, it is necessary to specify the “Path to a notebook file (optional)” field. If you leave this field empty, Binder will open the entire repository’s content in a Jupyter lab environment. All you need to do is find and copy the name of the notebook you wish to open. If the notebook is located in the repository’s root directory, you don’t need to add any further path specification. If the notebook is located in a subdirectory, specify the path to the notebook relative to the repository’s root directory.
Here is an example of a filled Binder form containing a notebook path specification:
 Example of a filled Binder form containing a notebook path specification.
Step 6: Launching Binder
Once you have entered the repository URL and configured the environment (if necessary), click the “Launch” button. Binder will initiate the building process, which might take a few moments, depending on the repository’s size and complexity.
If the repository contains a requirements.txt file, Binder will install the dependencies specified in the file. If the repository does not contain a requirements.txt file, Binder will attempt to detect the environment needed to run the notebook automatically. If the automatic detection fails, Binder will use the default environment.
Binder will generate an URL that you can share with others to allow them to access the notebook. For the notebook specified in the screenshot above, the according URL looks like:
Binder also creates a badge that you can embed in your website or README file to allow others to launch the notebook directly from GitHub:
Step 7: Interacting with the Jupyter notebook
After the building process completes, you will be redirected to a new page where the Jupyter notebook will be accessible in an interactive environment. You can now explore and execute the notebook’s code cells, visualize results, and interact with the provided content.
 Example of a running Jupyter notebook in Binder.
Conclusion
Opening Jupyter notebooks from GitHub in Binder provides a hassle-free way to access and interact with code shared by the community. By following the simple steps outlined in this guide, you can seamlessly launch a Jupyter notebook in a cloud-based environment without the need for local installations or complex setup procedures. This approach empowers researchers, data scientists, and enthusiasts to explore and leverage the vast array of Jupyter notebooks available on GitHub, fostering collaboration and knowledge sharing in the data science community.


comments