Spectral unmixing in Napari
If you haven’t installed Napari yet, please do so before proceeding with this tutorial. To practice this tutorial, install the following package(s) in your activated Napari conda environment:
mamba install -y napari-PICASSO
What is bleed-through?
Bleed-through is a phenomenon that occurs when the emission spectra of two fluorophores overlap and recorded in one channel. This makes it difficult to separate them. There are several image processing techniques available to reduce the bleed-through effect, in both supervised and unsupervised manners. These methods are generally referred to as spectral unmixing. In this tutorial, we will use the unsupervised method called “PICASSOꜛ”.
 Sketch depicting bleed-through: Emission of the green fluorophore can emit into the signal/channel of the yellow fluorophore if the two channels are a) not cleanly separated (range around the target wavelength is selected too large) or because b) two target wavelengths are too close together.
 Example 3-channel-recording of cells in the mouse spinal cord. The green channel contains GFAP labeled cells, the yellow channel contains LMNB1 labeled cells, and the magenta channel a non-specified fluorophore. The image is taken from the PICASSO sample image datasetꜛ and is also provided in the data folder of this tutorial. Unfortunately, no further information about the sample is available.
 Example image from above, split into the three channels, with GFAP on the left, LMNB1 in the middle and the non-specified fluorophore on the right. The bleed-through effect is visible in the green channel, where the LMNB1 (yellow) signal is also present, exemplarily indicated by the red arrow.
Spectral unmixing with PICASSO
PICASSO is an algorithm by Seo et al. (2022)ꜛ designed to eliminate fluorescence bleed-through by reducing the mutual information between so-called sink and source images. The Napari pluginꜛ employs a neural network (MINE) to estimate and minimize the mutual information between sink and source image pairs. This is accomplished using stochastic gradient descent with GPU acceleration for improved performance.
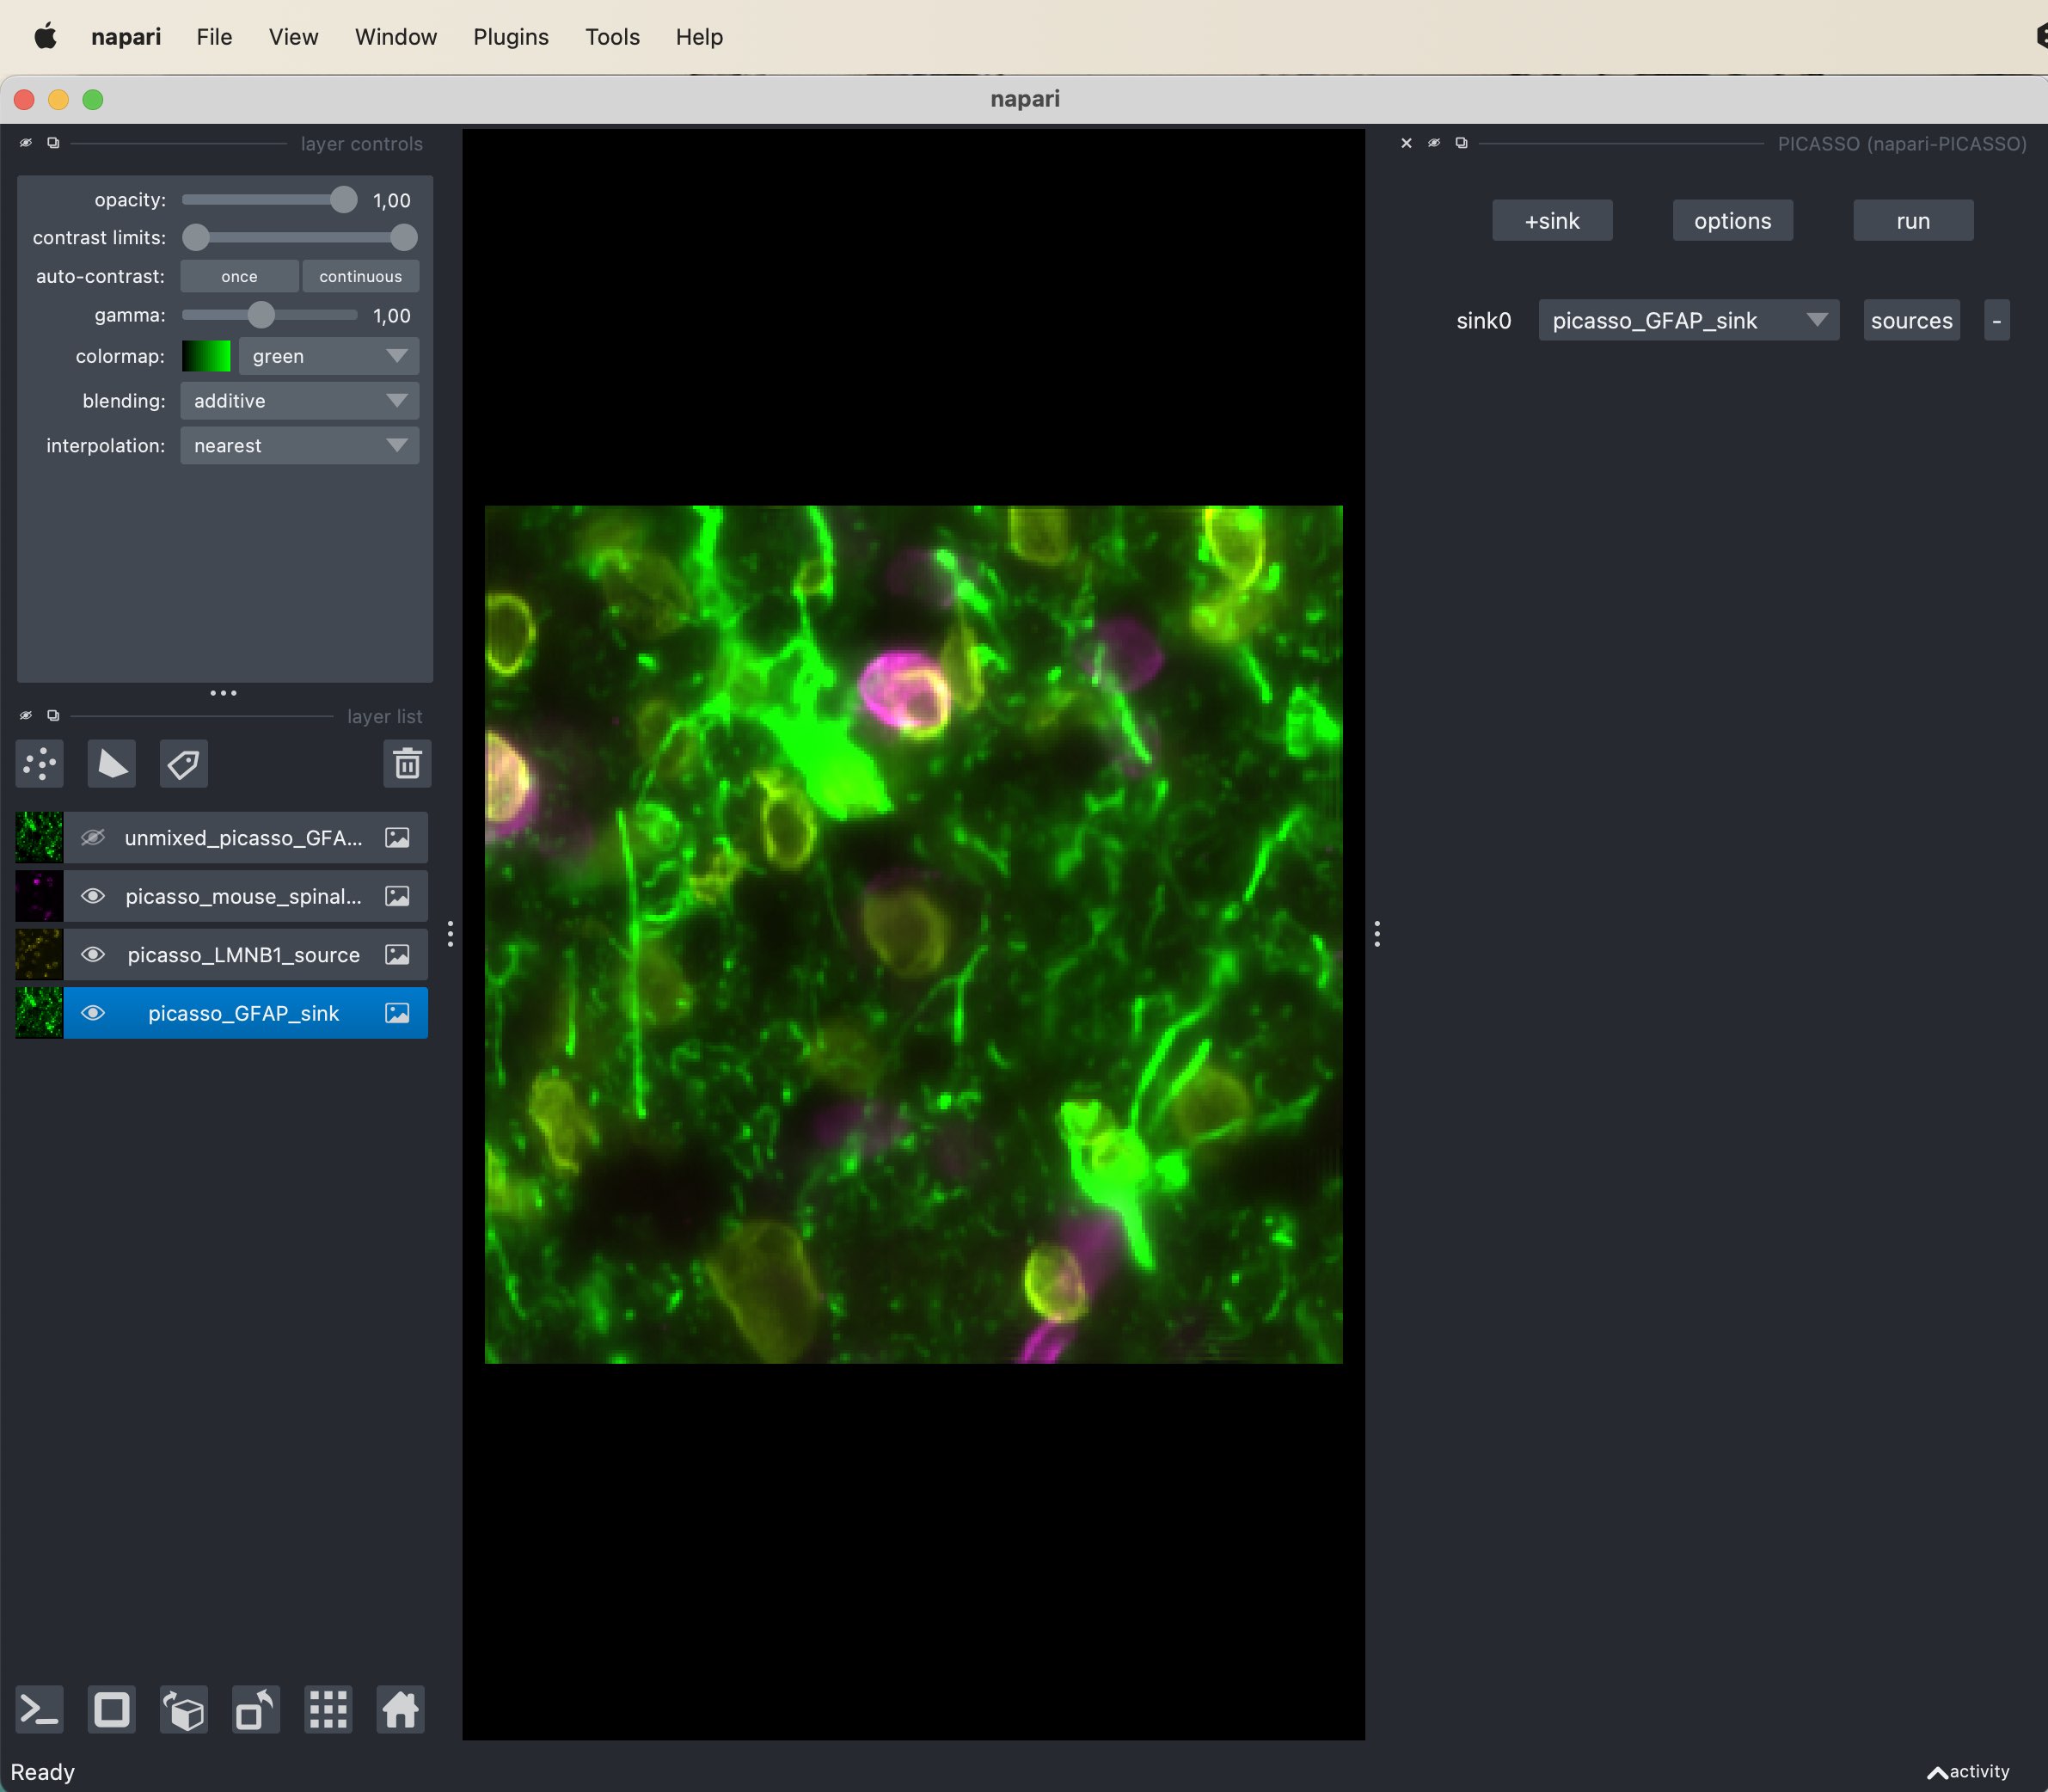
To perform the spectral unmixinig, the individual channels of the corresponding multi-channel image have to be split into single-channel layers (right-clicking on the image and selecting Split Stack if not already done; the provided sample images are already split). From the Plugins menu, choose PICASSO to open the PICASSO widget. Add minimum one sink channel and specify it by selecting the corresponding layer in the occurring drop-down menu:
 The PICASSO widget in Napari with the sink channel selected. The sink channel is the channel/layer that is affected by the bleed-through effect from the source channel/layer. In this example, the GFAP channel is selected as sink and the LMNB1 channel as source.
The sink channels are the channels that are causing the bleed-through. After adding the sink channel, verify that the correct source channel is selected by clicking on source (right from skin channel setting). Here the choose the GFAP channel/layer as sink and the LMNB1 channel/layer as source as the latter is the source of the bleed-through in the GFAP layer. If the bleed-through would be apparent in other channels as well, you can more sink-source pairs (however, this is not the case in our example). When you’re done selecting the right channels, simply hit the run button and wait until the unmixing is done. The resulting unmixed sink image will appear as a new layer in the layer list.
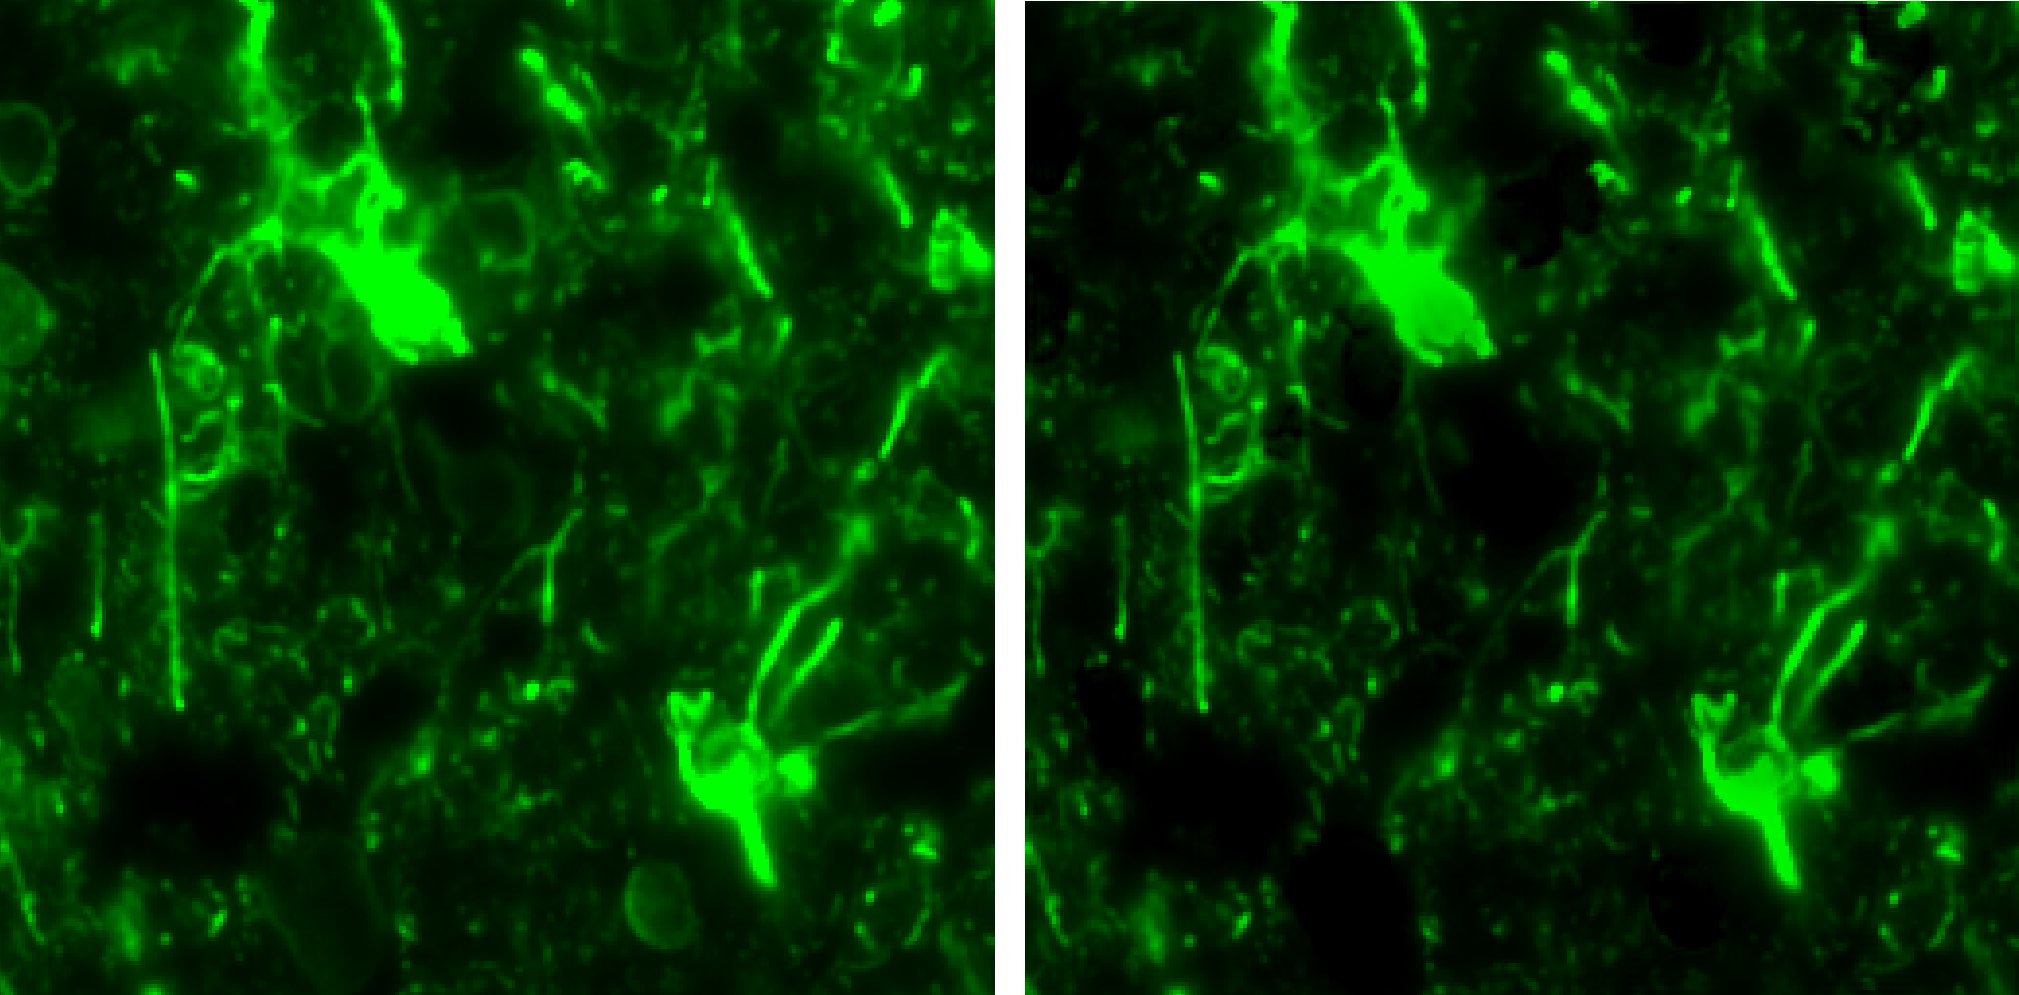
 The bleed-through affected channel (left) and the result of the spectral unmixing (right).
Further readings
- Seo, J., Sim, Y., Kim, J. et al. PICASSO allows ultra-multiplexed fluorescence imaging of spatially overlapping proteins without reference spectra measurements. Nat Commun 13, 2475 (2022). doi.org/10.1038/s41467-022-30168-zꜛ
- GitHub repository of the PICASSO pluginꜛ
- Napari hub page of the PICASSO pluginꜛ
- Belghazi, M. I. et al. MINE: Mutual Information Neural Estimation. arXiv:1801.04062ꜛ, (2018).
Acknowledgements
The image used in this tutorial is taken from the PICASSO sample image datasetꜛ.