Scale bars and adjusting image scaling
If you haven’t installed Napari yet, please do so before proceeding with this tutorial. To practice this tutorial, install the following package(s) in your activated Napari conda environment:
mamba install -y napari-assistant
Adding a scale bar
Adding a scale bar to your images in Napari is pretty easy. Simply toggle the visibility of the scale bar from the View->Scale Bar menu:
 Adding a scale bar to an image.
In principle, it should be possible to drag and drop the scale bar around. It should also be possible to resize the scale bar and use it as a measurement tool, as described in this forumꜛ. However, I was not able to do this in my current Napari installation.
Saving the image with the scale bar overlay
You can quickly save the image with the scale bar by taking a screenshot from within Napari: File->Save Screenshot.
 Taking a screenshot in Napari. The shown image is taken from the PICASSO sample image datasetꜛ
 The saved screenshot including the scale bar as an overlay.
Taking measurements in Napari
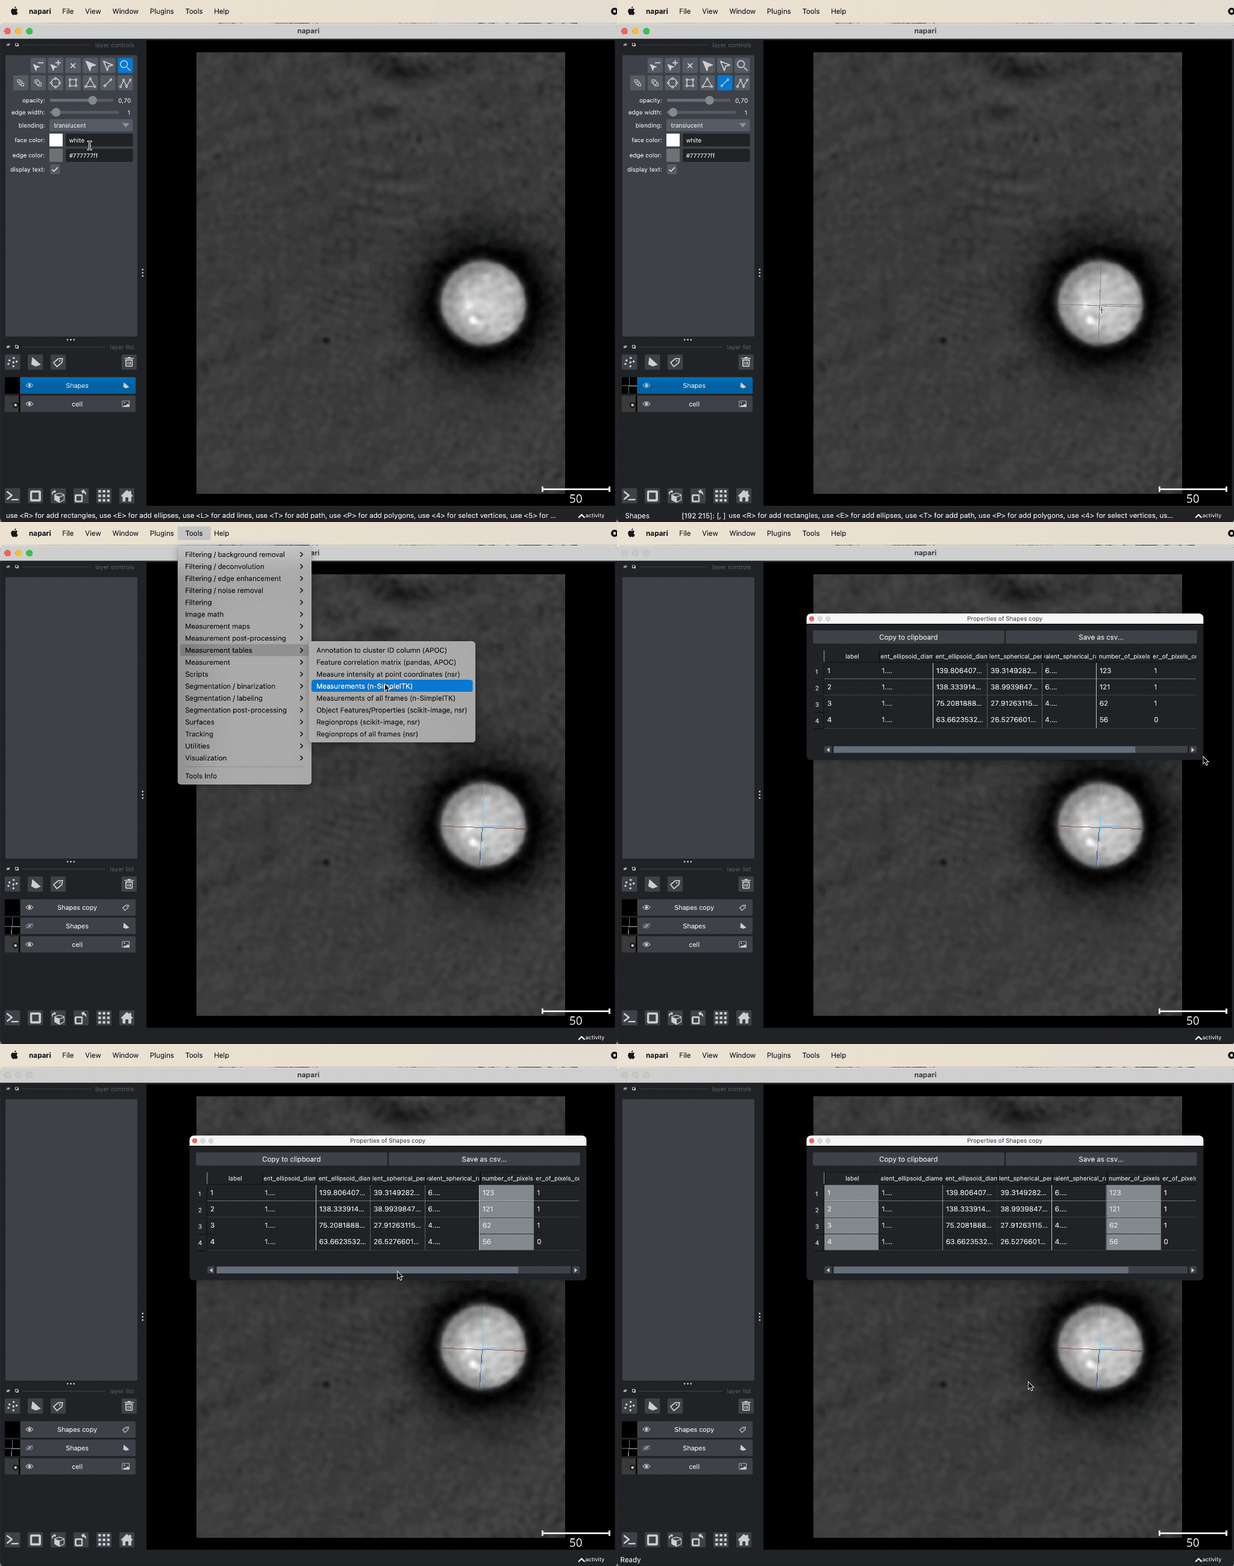
At the moment, there is no dedicated plugin to perform spatial measurements in Napari. However, we can bypass this lack by utilizing the shape and label layer:
- Create a new shape layer.
- Draw one are more lines according to what you’d like to measure.
- Duplicate the shape layer. We keep the original shape layer just in case we’d like to add more lines later on. In the next step we would lose this layer otherwise.
- Convert the copied shape layer to a label layer.
- From the
Tools->Measurement tables, chooseMeasurements.
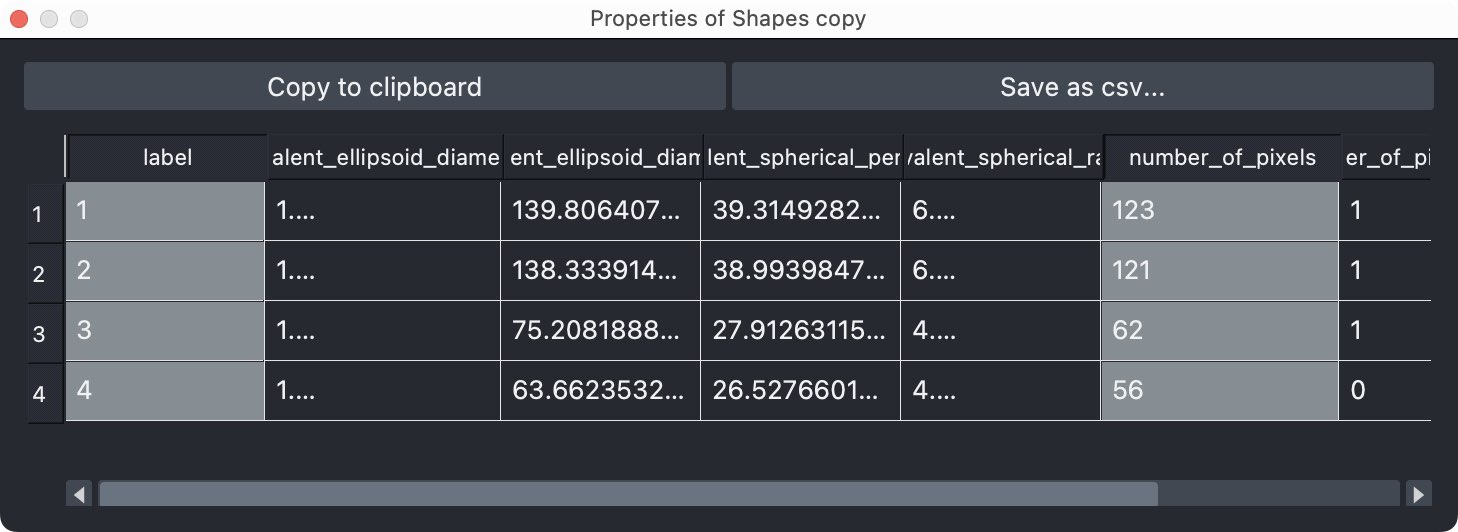
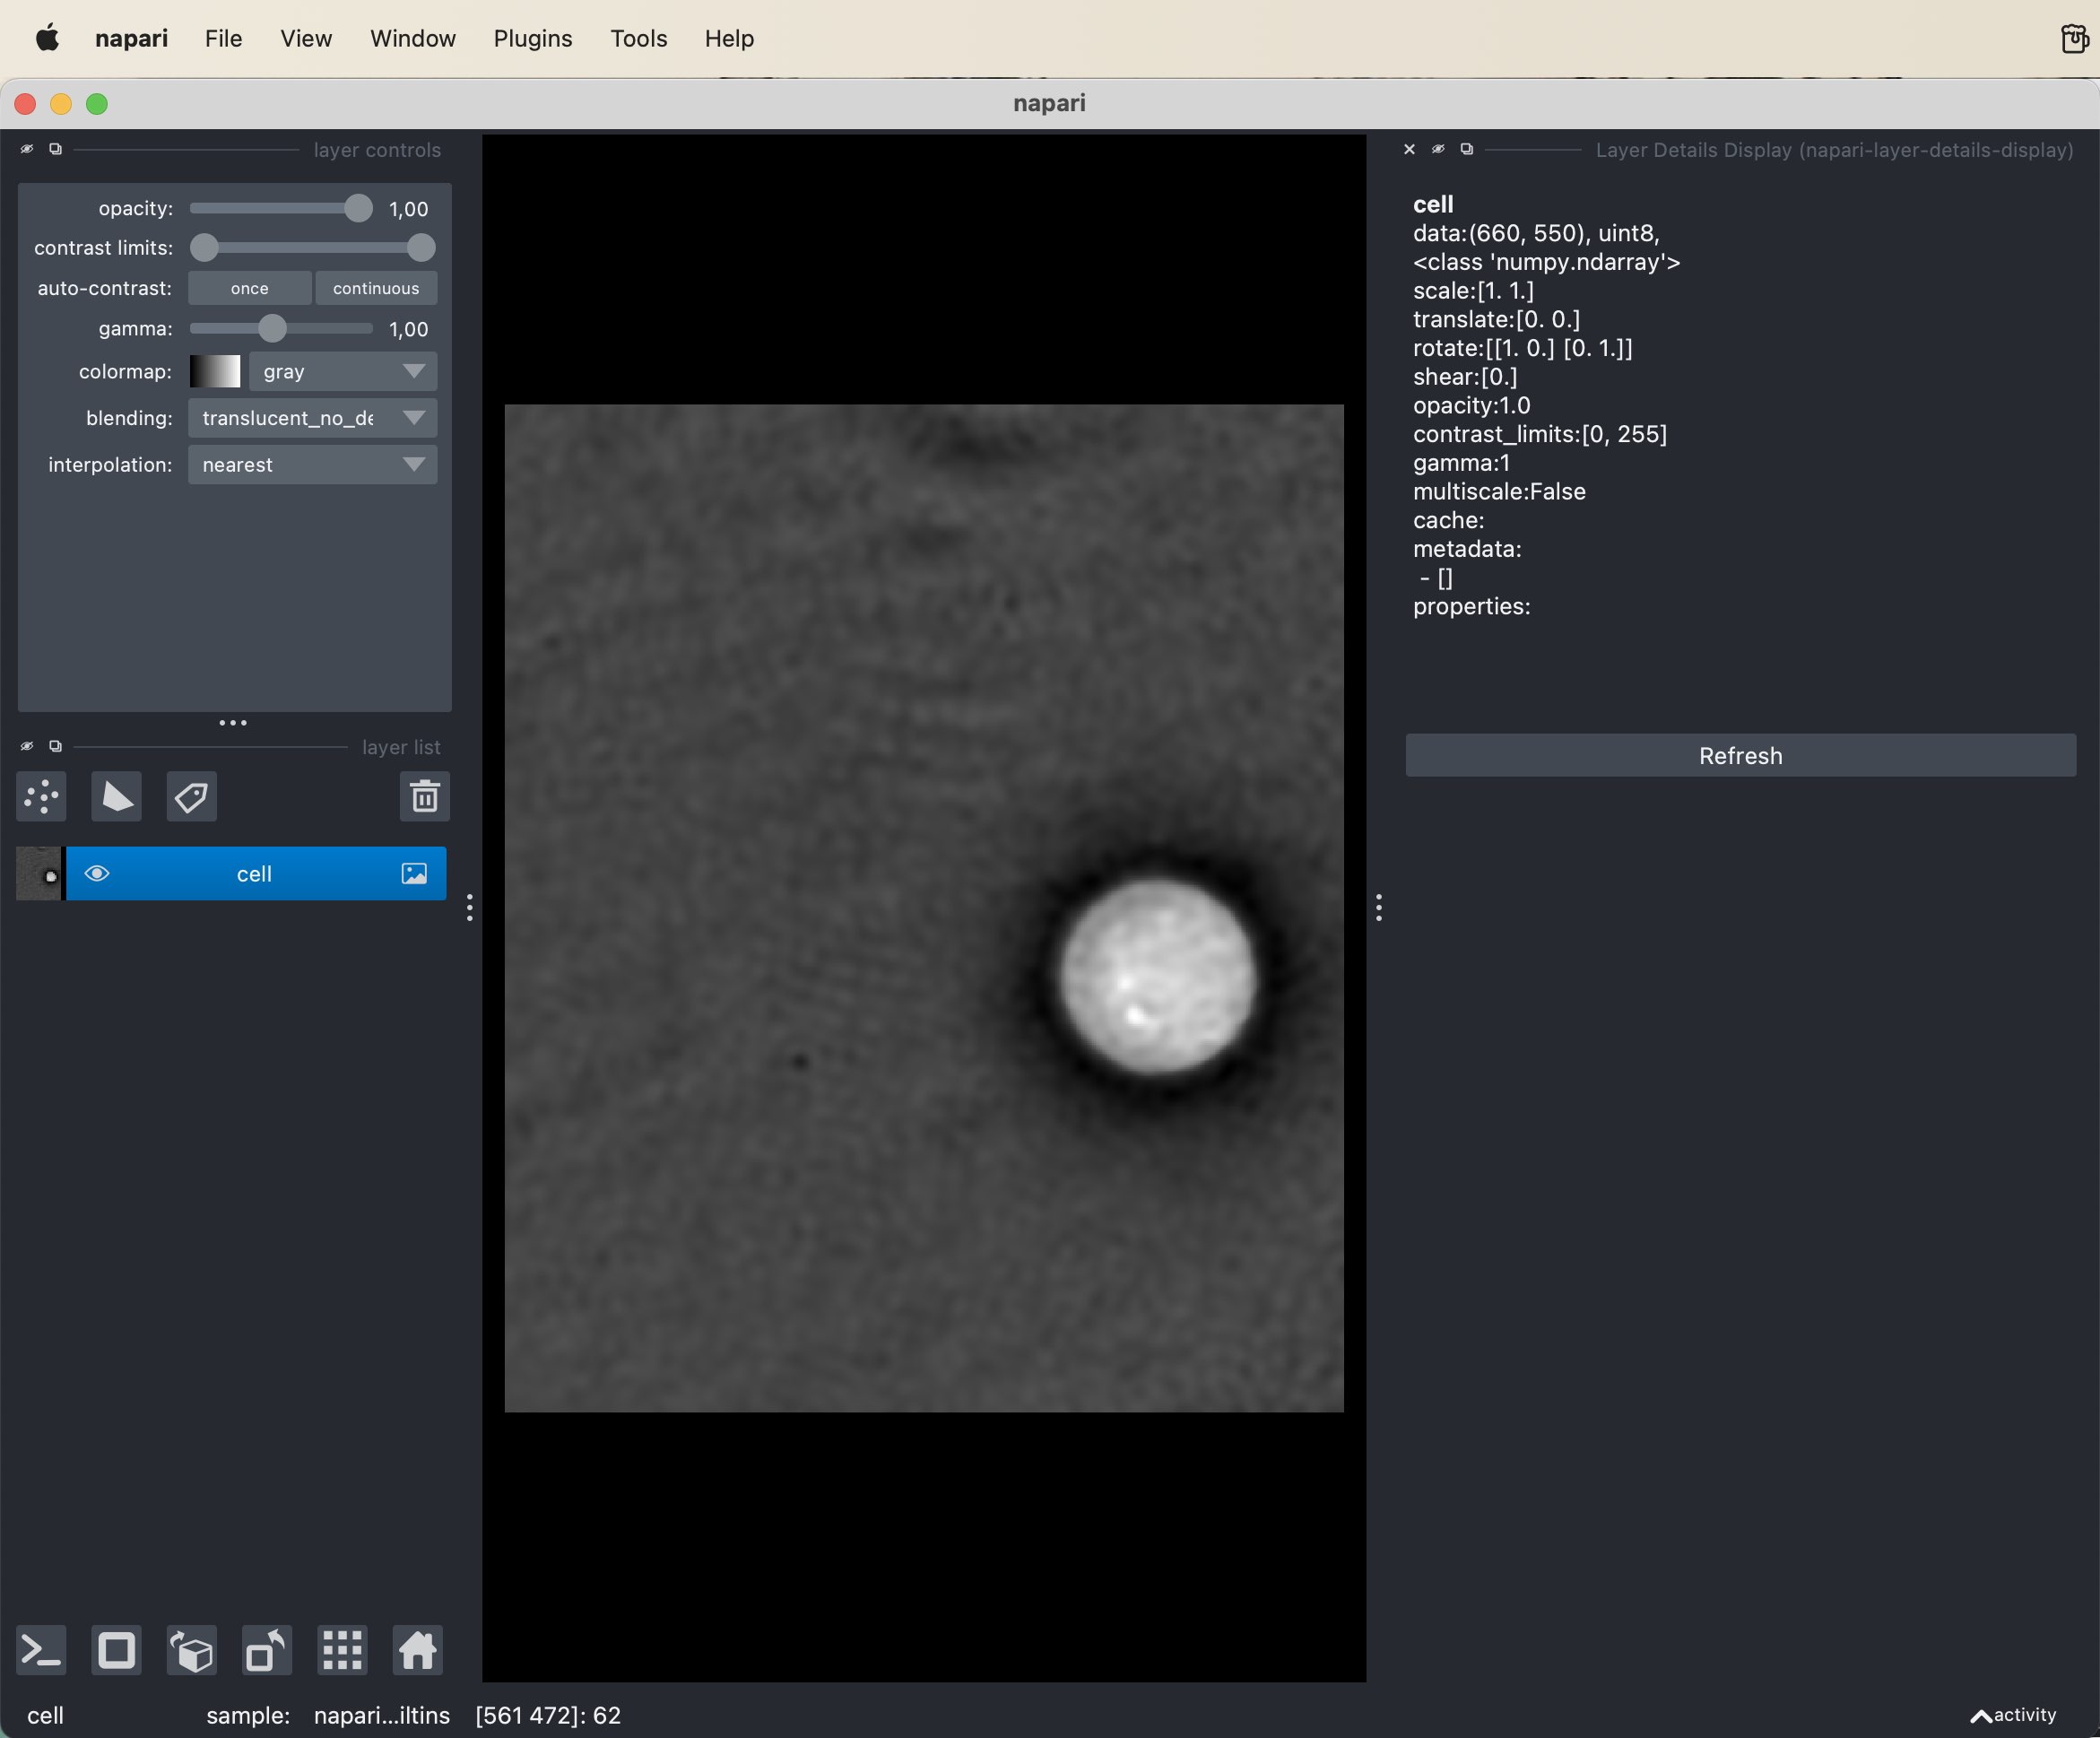
That’s it. The last step will create a measurement table, where column number of pixels contains the pixel lengths of the drawn lines associated to the according label in the label column. If the scaling of the axes in your image is not 1, you additionally need to multiply the number_of_pixels by the corresponding scaling factor. How to determine the current scaling of your image axes is described in the next section. Alternatively, you can extract the current image scaling from the layer details displayꜛ plugin from the Plugins->Layer Details Display menu.
If you’d like to add more measurements, start again from step 2 using the original shape layer from your first measurement.
 Taking measurements in Napari: Create a shape layer, draw lines, duplicate and convert the shape layer to a label layer, and finally create a measurement table.
 The measured lengths in pixels are listed in the
 number_of_pixels column, and the according measurement labels in the label column. If necessary, multiply the pixel lengths by the scaling of the image axes.
 The layer details display plugin shows the current scaling as well as several over relevant info of the currently selected layer.
What if the scaling of my image is incorrect?
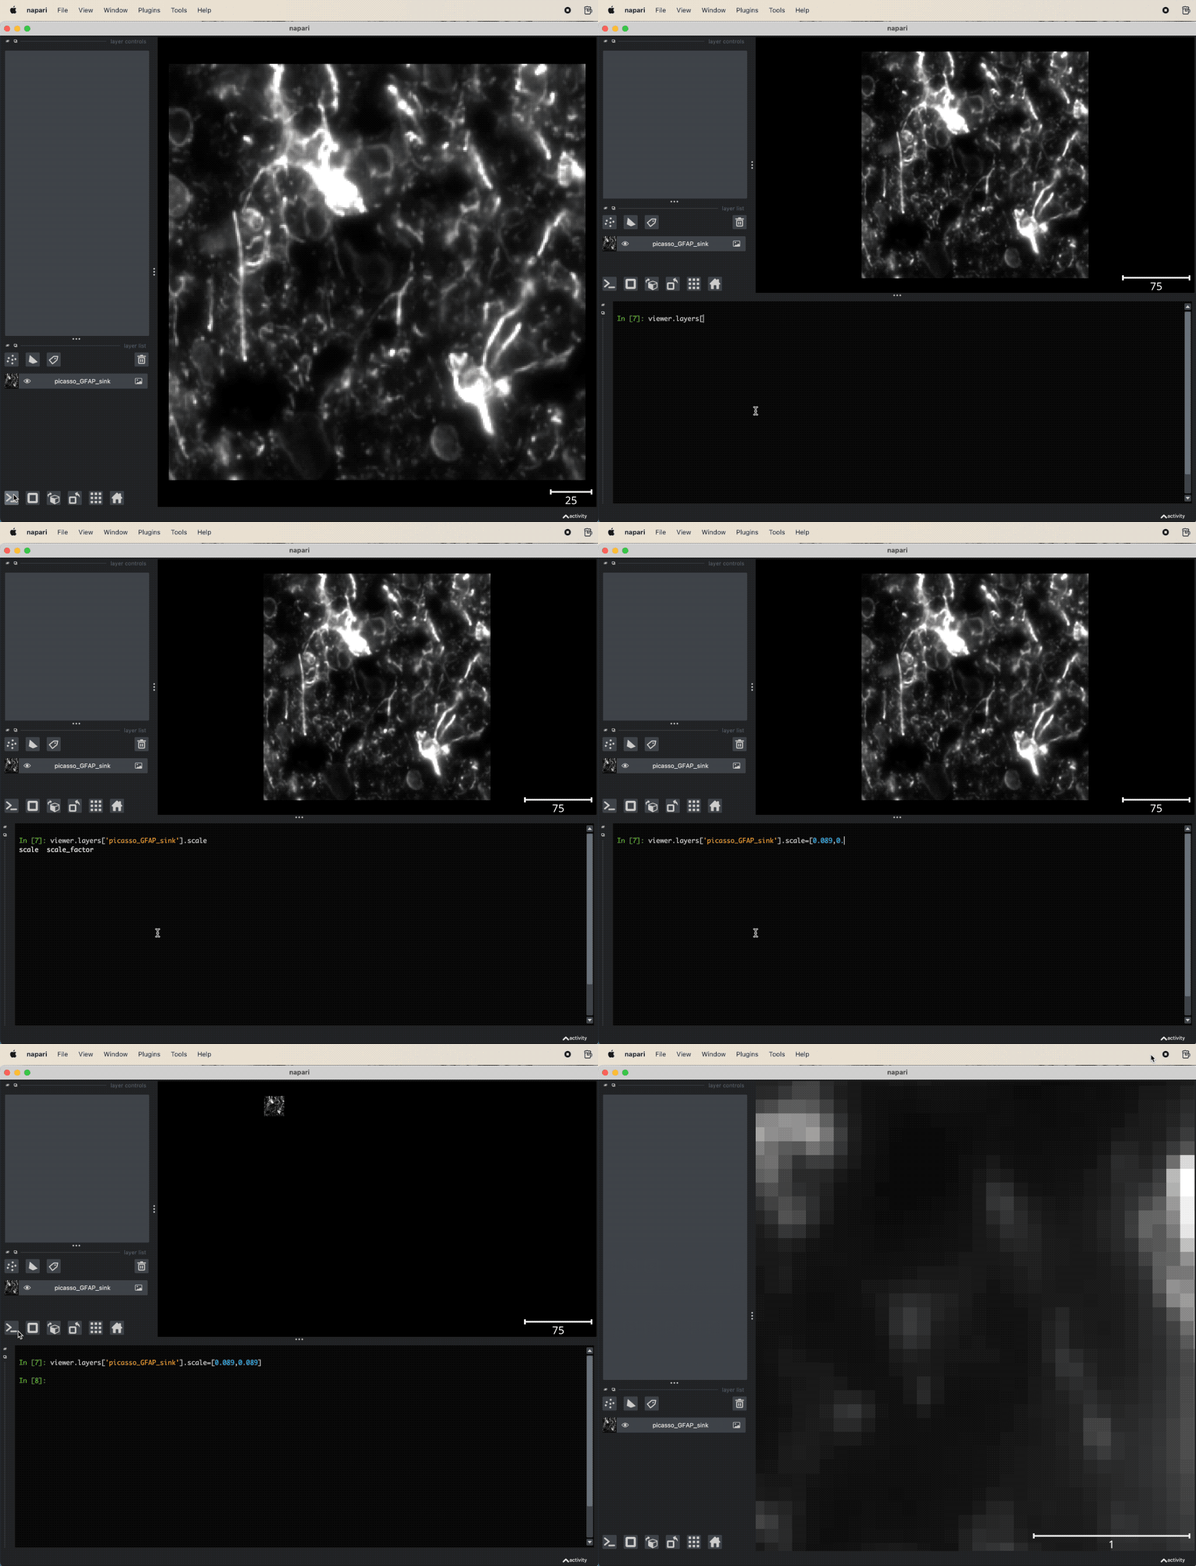
If the scaling of your image is incorrect or not correctly recognized while loading the image into Napari (in this case, the scaling is set to 1 for all axis), we can manually correct the scaling of the image. However, can’t be done directly via a plugin, but we need to use the Napari console. Open the IPython console from the lower left control panel. Now, type in the following command to check the current scaling of the image:
viewer.layer['NAME_OF_THE_LAYER'].scale
where NAME_OF_THE_LAYER is the name of the layer you want to examine. This command will print out a tuple of numbers corresponding to the scaling of each axis, i.e., for a 2D image you will get a pair of two numbers, for a 3D image a triplet of three numbers, and so on.
To overwrite the current scaling, type the following command:
viewer.layer['NAME_OF_THE_LAYER'].scale=[1,1]
The tuple scale=[1,1] corresponds to the desired scaling for each axis of the given image (here: 2D; for a 3D image, enter three values)
 Change the scaling of an image in Napari.
Lifehack: In the IPython console, you can use the TAB key to autocomplete commands and names of the layers.
What if Napari is identifying the axes in the wrong order?
You can change the order of the axes in a similar way as you would change the image’s scaling. In the IPython console, type in the following command to check the current order of the axes:
viewer.dims.order
(0, 1, 2, 3)
To change the order of the axes, type in the following command:
viewer.dims.order=(1,0,2,3)
Swap the axes numbers (1,0,2,3) to match the desired order.
Acknowledgements
The image used in the screenshot examples is taken from the PICASSO sample image datasetꜛ.