A minimal Python installation with miniconda
Minicondaꜛ is a minimal, Python specific installer for condaꜛ, the open-source and command line based package and environment manager. Miniconda works cross-platform, i.e., you can install it on any operating system (Linux, macOS, Windows). In this post we learn, how to use conda for installing and managing Python packages in our projects.
![]()
Another popular package installer and management tool, pip, I will discuss in my next post.
Update: It is no longer recommended to install Miniconda due to lates licensing changes by Anaconda, Inc. Instead, I recommend to use Miniforgeꜛ, which is a community-driven minimal installer for conda and mamba. For more information, see my post about Miniforge.
Install Miniconda
Just head to Miniconda’s download websiteꜛ and download the appropriate version for your OS.
![]() Miniconda installation dialog under macOS.
Miniconda installation dialog under macOS.
You can verify your installation by opening a terminal (macOS/Linux) or the Anaconda Prompt from the Start Menu (Windows). Enter
conda --v
and you should get something like
conda 4.14.0
which confirms the conda/miniconda installation. Let’s additionally add the conda-forge channel to the channel list of the conda installation:
conda config --add channels conda-forge
conda config --get channels
  --add channels 'defaults'   # lowest priority
  --add channels 'conda-forge'   # lowest priority
Channelsꜛ are the locations where conda looks for Python packages. If you skip this step, you have to add -c conda-forge to all package installation commands, e.g., conda install -c conda-forge napari.
The commands in the following example applications are all meant to be executed in a terminal (macOS/Linux) or in the Anaconda Prompt (Windows). There is also a summary of all conda commands on the Conda Cheat Sheetꜛ, that provides an excellent overview of the conda management.
How to get conda running in the Windows PowerShell?
To make conda also available in the Windows PowerShell, follow the instructions provided in this post.
Do I also have to install Python from python.org?
No. conda downloads the desired Python interpreter when you, e.g., create a virtual environment (see below). If you had installed Python before, with python --version you can check in the terminal, which (base) version is installed and which version is used by your current virtual environment.
Virtual environments
Virtual environmentsꜛ (venv) are kind of sandboxed spaces, where we install all Python packages that are necessary for a specific project. These sandboxes are isolated from each other and guarantee, that different per-project dependencies do not interfere with each other. As with Python’s built-in venv command, it’s quite easy to create such virtual environments with the conda createꜛ command:
conda create -n my_test_venv -y python=3.9
where
-n my_test_venv, equivalent to-name my_test_venv, defines the custom name of the new environment (here: “my_test_venv”),-yor-yessets all confirmation prompts during the installation to “yes”, andpython=3.9defines the Python version we’d like to install.
In order to work with the environment, we need to activate it:
conda activate my_test_venv
We can verify the activation via
which python
and we should get a response like
/Users/USER/miniforge3/envs/my_test_venv/bin/python
To deactivate the environment, type:
conda deactivate
On Windows, simply type deactivate.
In order to get an overview over all already created environments, use the list command:
conda env list
and if you want to remove one of them, type:
conda env remove --name my_unwanted_venv
Working with virtual environments
I highly recommend to work with virtual environments and not with the system interpreter solely. Some Python packages rely on the co-installation of other packages. And sometimes these co-packages are required to be in a specific version (e.g., not higher than a certain version number) to prevent inconsistencies or obsolescence due to changes in the co-packages. If you install everything in the system interpreter, it can happen at some time point, after installing or updating some Python packages, that other packages or our own pipelines show a different behavior or don’t work at all.
All examples shown here are assumed to be carried out in an activated virtual environment.
Clone an environment
We can create an exact copy of an existing environment via
conda create --clone my_test_venv --name my_test_venv_clone
Port an environment
There is also a way, to transfer environments by first saving its dependencies to a textfile,
conda list --explicit > my_test_venv.txt
then, transfer the created textfile to the desired location (e.g., another computer), and rebuild the environment via
conda env create --file my_test_venv.txt
Unless otherwise specified, the generated textfile will be saved in your home directory. To write it to a specific folder, either add the full path to the conda list command (e.g. conda list --explicit > ~/Downloads/my_test_venv.txt (Linux/macOS) or conda list --explicit > C:.../Downloads/my_test_venv.txt (Windows)), or change to the destination directory before you export the environment (e.g., cd ~/Downloads/). The same accounts for the create command, where you can provide a specific path as well.
Install Python packages via conda
Installing Python packages via conda is quite easy, First, activate the desired destination environment (e.g., conda activate my_test_venv), and then type:
conda install -y PACKAGENAME
or
conda install -y PACKAGENAME1 PACKAGENAME2 PACKAGENAME3
if you’d like to install several packages at once. For instance, a typical package installation for data scientists could be
conda install -y numpy matplotlib scipy pandas seaborn pingouin notebook jupyter_contrib_nbextensions
We can search for a specific package with conda,
conda search PACKAGENAME
or visit the Anaconda package lists websiteꜛ, which lists all default conda packages (in the table shown on that website, search for your desired Python version and your OS, and then click on the corresponding link). Or visit the conda-forge packages websiteꜛ, which lists all packages that are available on the conda-forge channel.
We can remove any installed package via
conda remove --name PACKAGENAME
To update packages, we can do that individually,
conda update PACKAGENAME
or all at once:
conda update --all
Install code from GitHub: In this post I describe, how to install Python code from GitHub, that is not available via conda or pip.
Using the Python interpreter
We can launch a Python interpreter console in an activated virtual environment via
python
where we can execute both, simple Python code,
print(2*10**3, ", hello world.")
2000, hello world.
and also more complex commands:
import matplotlib
matplotlib.use('TkAgg')
import matplotlib.pyplot as plt
import numpy as np
import seaborn as sns
sns.set_theme(style="ticks")

rs = np.random.RandomState(11)
x = rs.gamma(2, size=1000)
y = -.5 * x + rs.normal(size=1000)

sns.jointplot(x=x, y=y, kind="hex", color="#40aab3")
plt.show()

print("hello world.")
![]()
To exit the interpreter, simply type:
exit()
Using the IPython console
A more powerful command line based tool for Python as the standard Python interpreter is IPython, the Interactive Pythonꜛ console. Among others, it provides a better interactive and enhanced console environment, particularly for scientific computing, and supports interactive data visualization.
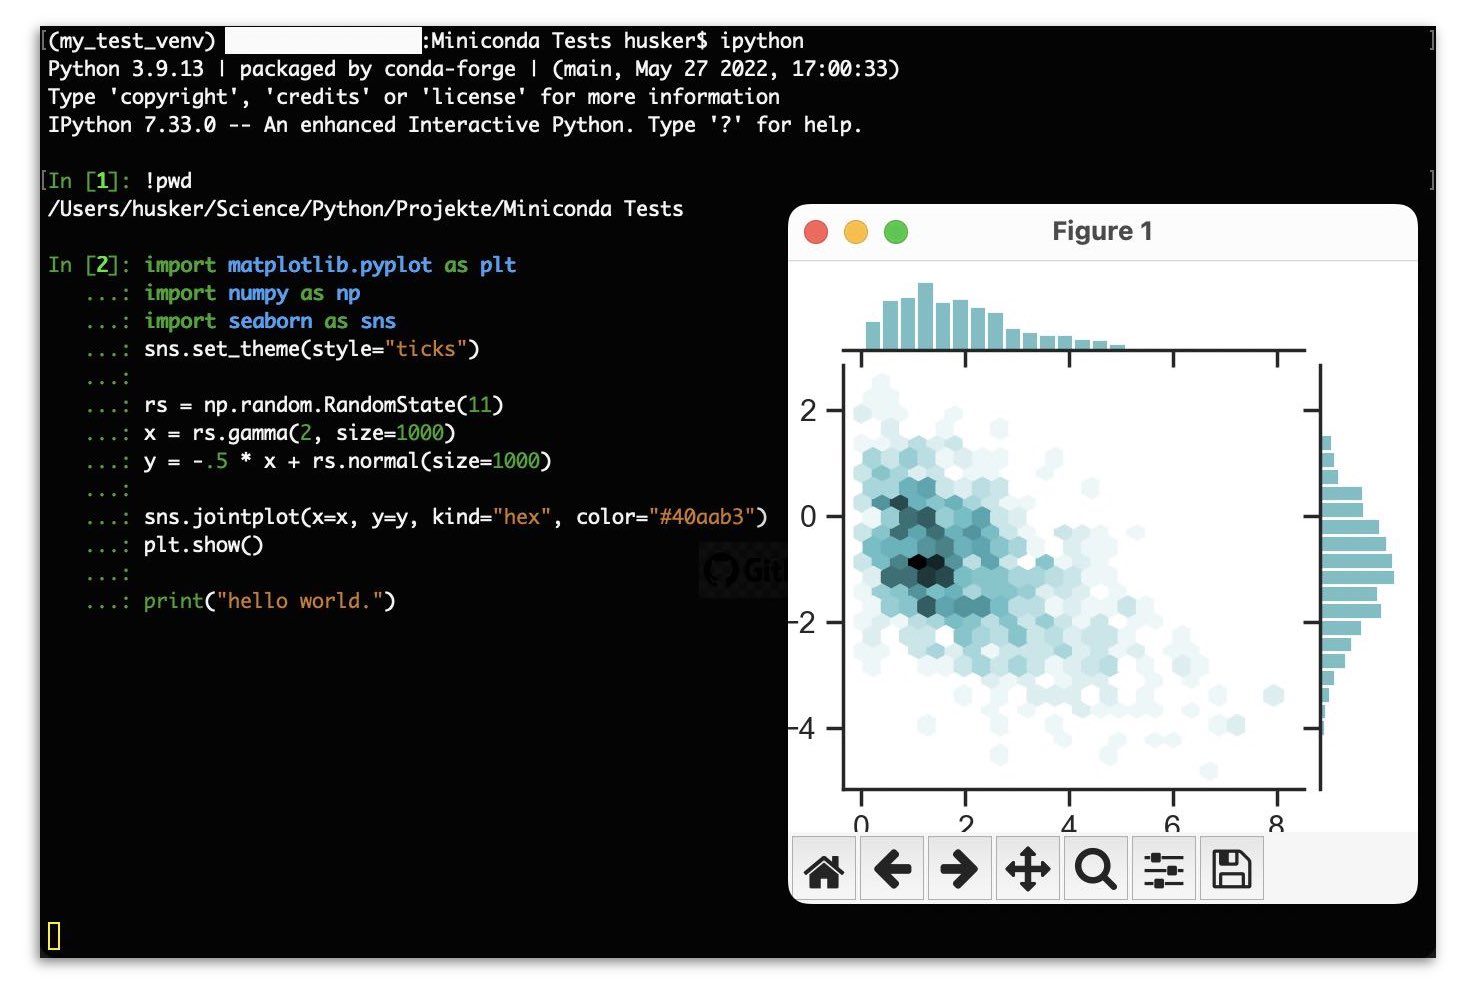
We can easily install IPython via conda:
conda install -y ipython
and run it via:
ipython
In an IPython console, we can apply the same Python commands is with the default Python interpreter. Additionally, we can also execute default console commands by prefixing the corresponding command by an exclamation mark (!):
!pwd
!ls -l
!conda install -y numpy
To exit an IPython session, type:
exit()
Run a Python script
To run a Python script, type:
python PATH_TO_THE_SCRIPT/SCRIPT_NAME.py
For instance, we can save the Python code from the seaborn exampleꜛ above into a textfile, called, e.g., “my_python_script.py”,
![]()
and then run that script via
python my_python_script.py
Install an editor or IDE that supports Python
Instead of using the default texteditor of our OS, we can also use one of the many cross-platform editors and IDE1 like Atom editorꜛ2, Spyder, PyCharmꜛ or VS Code. They come along with specific support for Python like syntax highlighting or auto-completion. The Spyder IDE can be installed via conda directly (i.e., you don’t have to download it from the corresponding website as it is the case for the other editors):
conda install -y spyder
Run it via
spyder
![]()
Open a Jupyter Notebook and JupyterLab
As an alternative to the editor and IDE, we can also open a Jupyter Notebookꜛ in the browser:
conda install -y notebook
To run a Jupyter server and open Jupyter Notebooks in the browser, just type
jupyter notebook
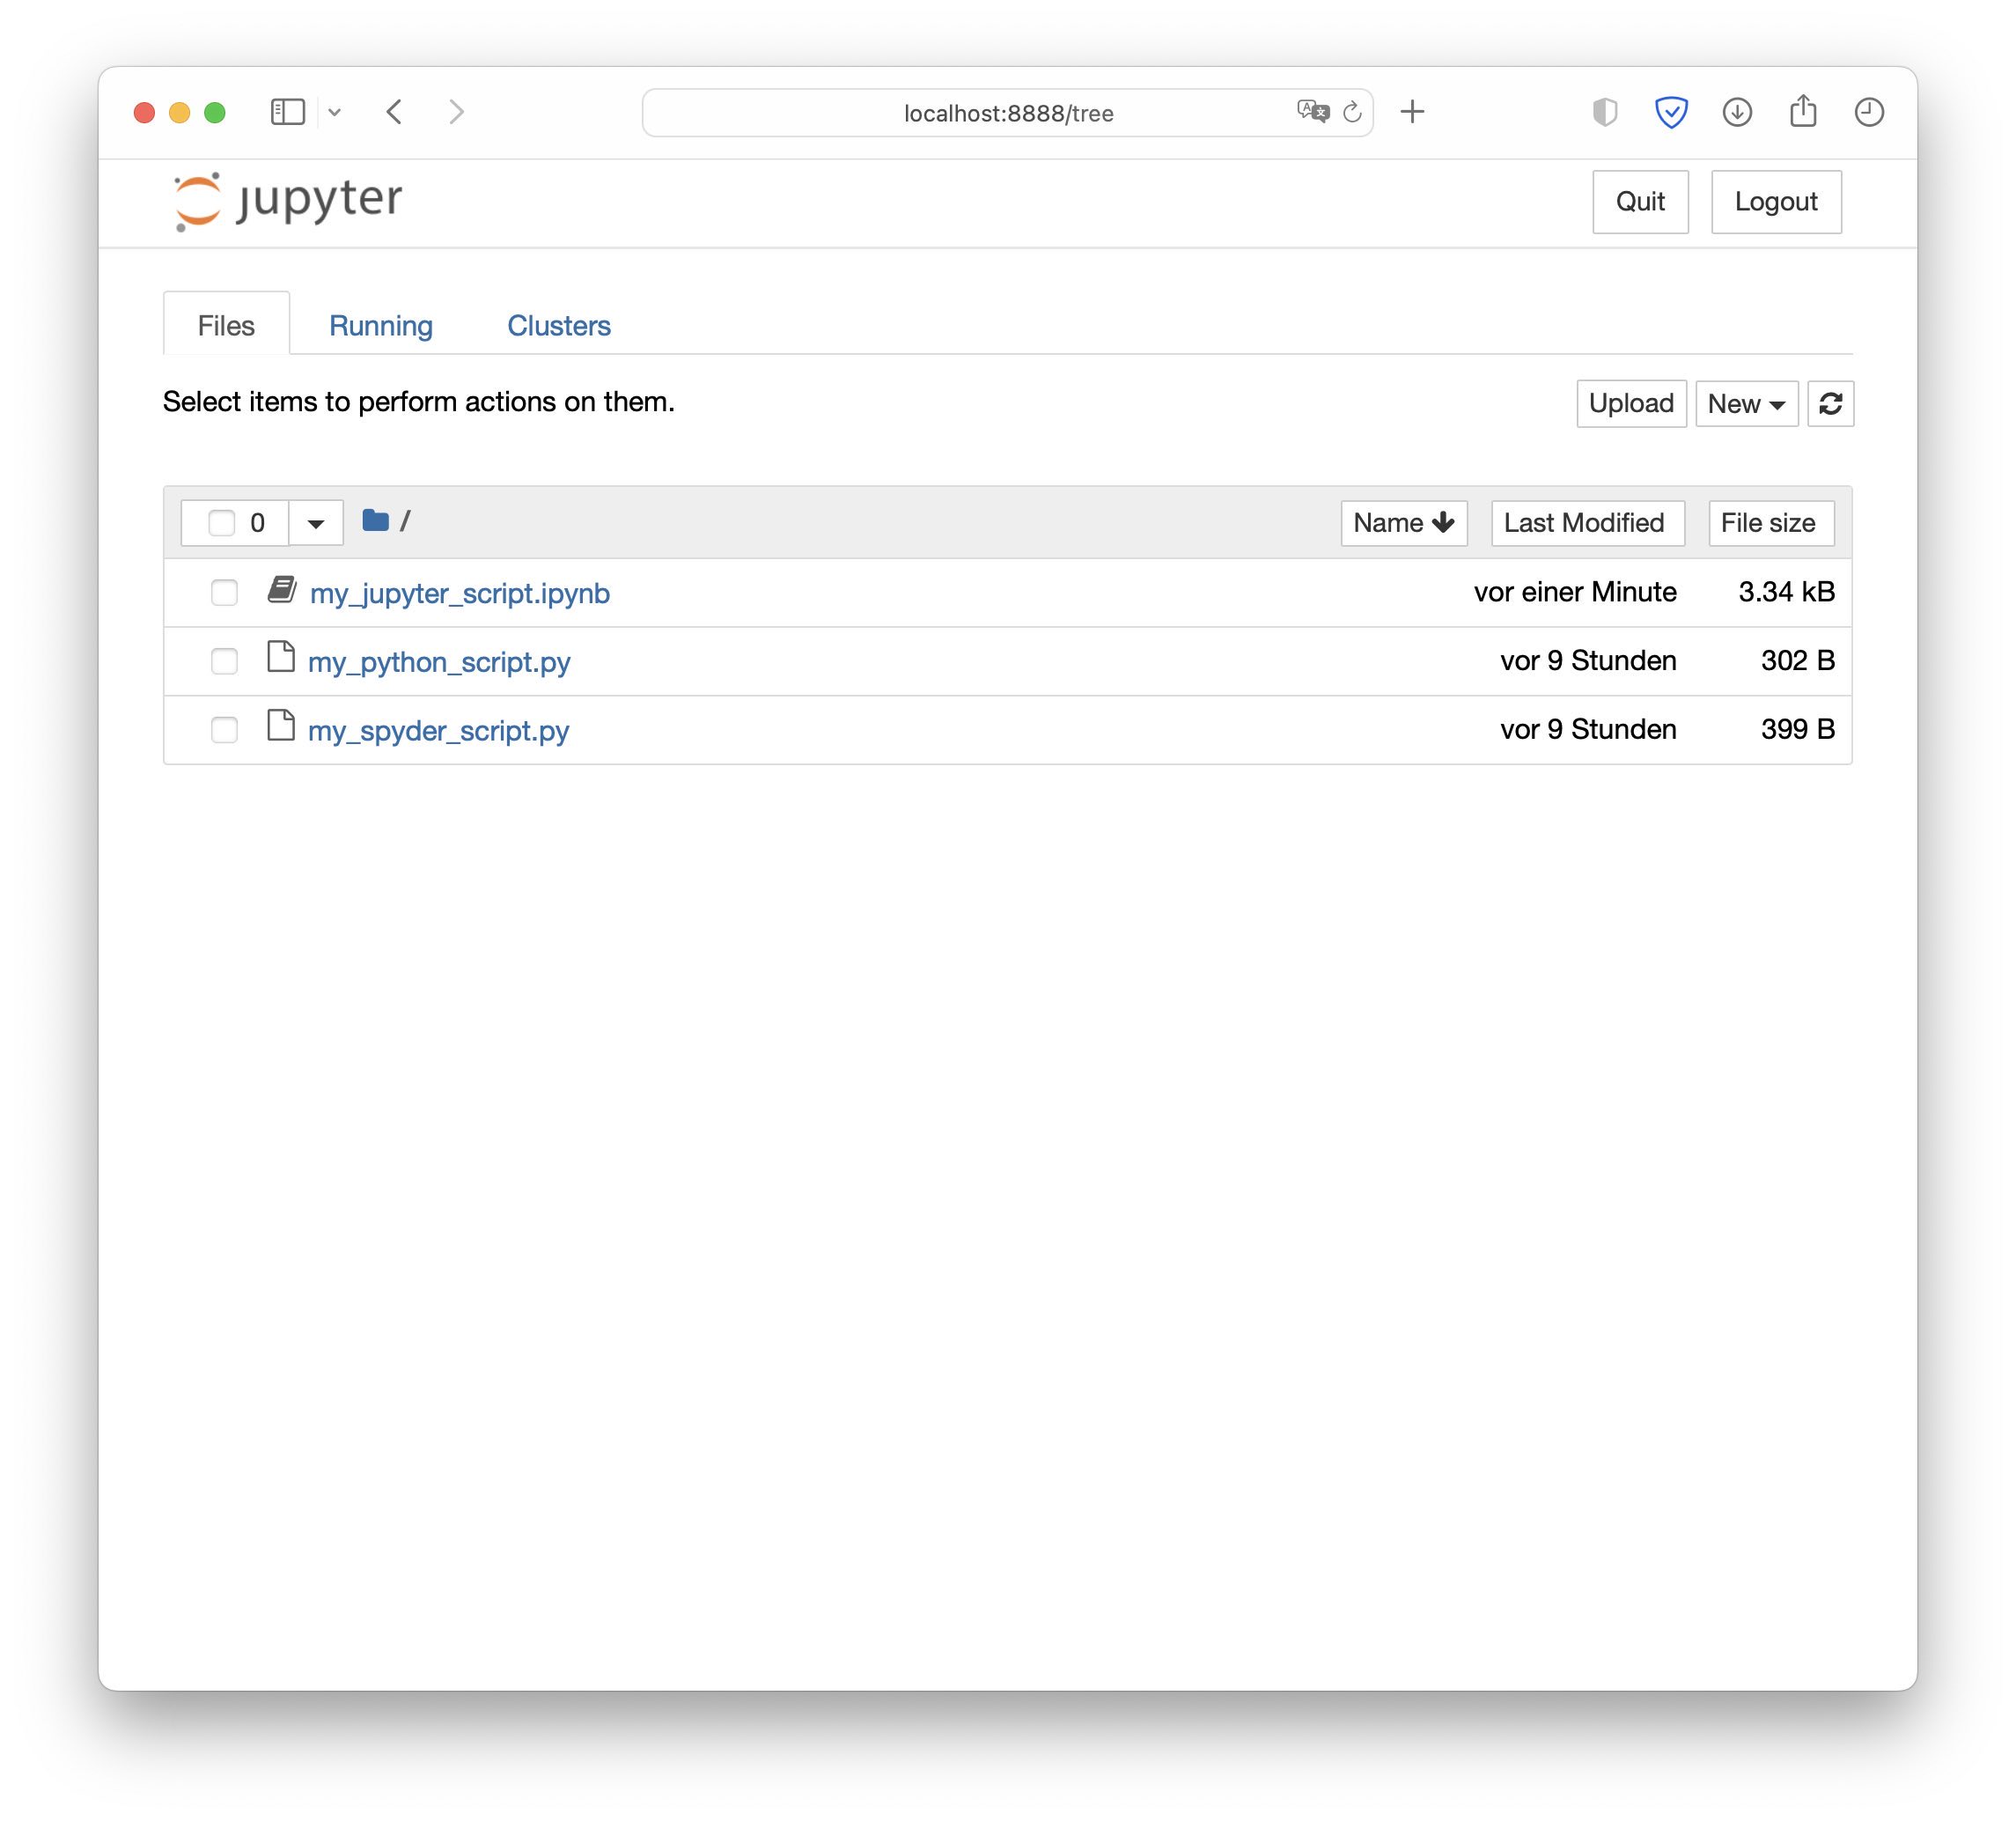 Jupyter Notebook’s’ Files view (Jupyter Notebook’s start screen).
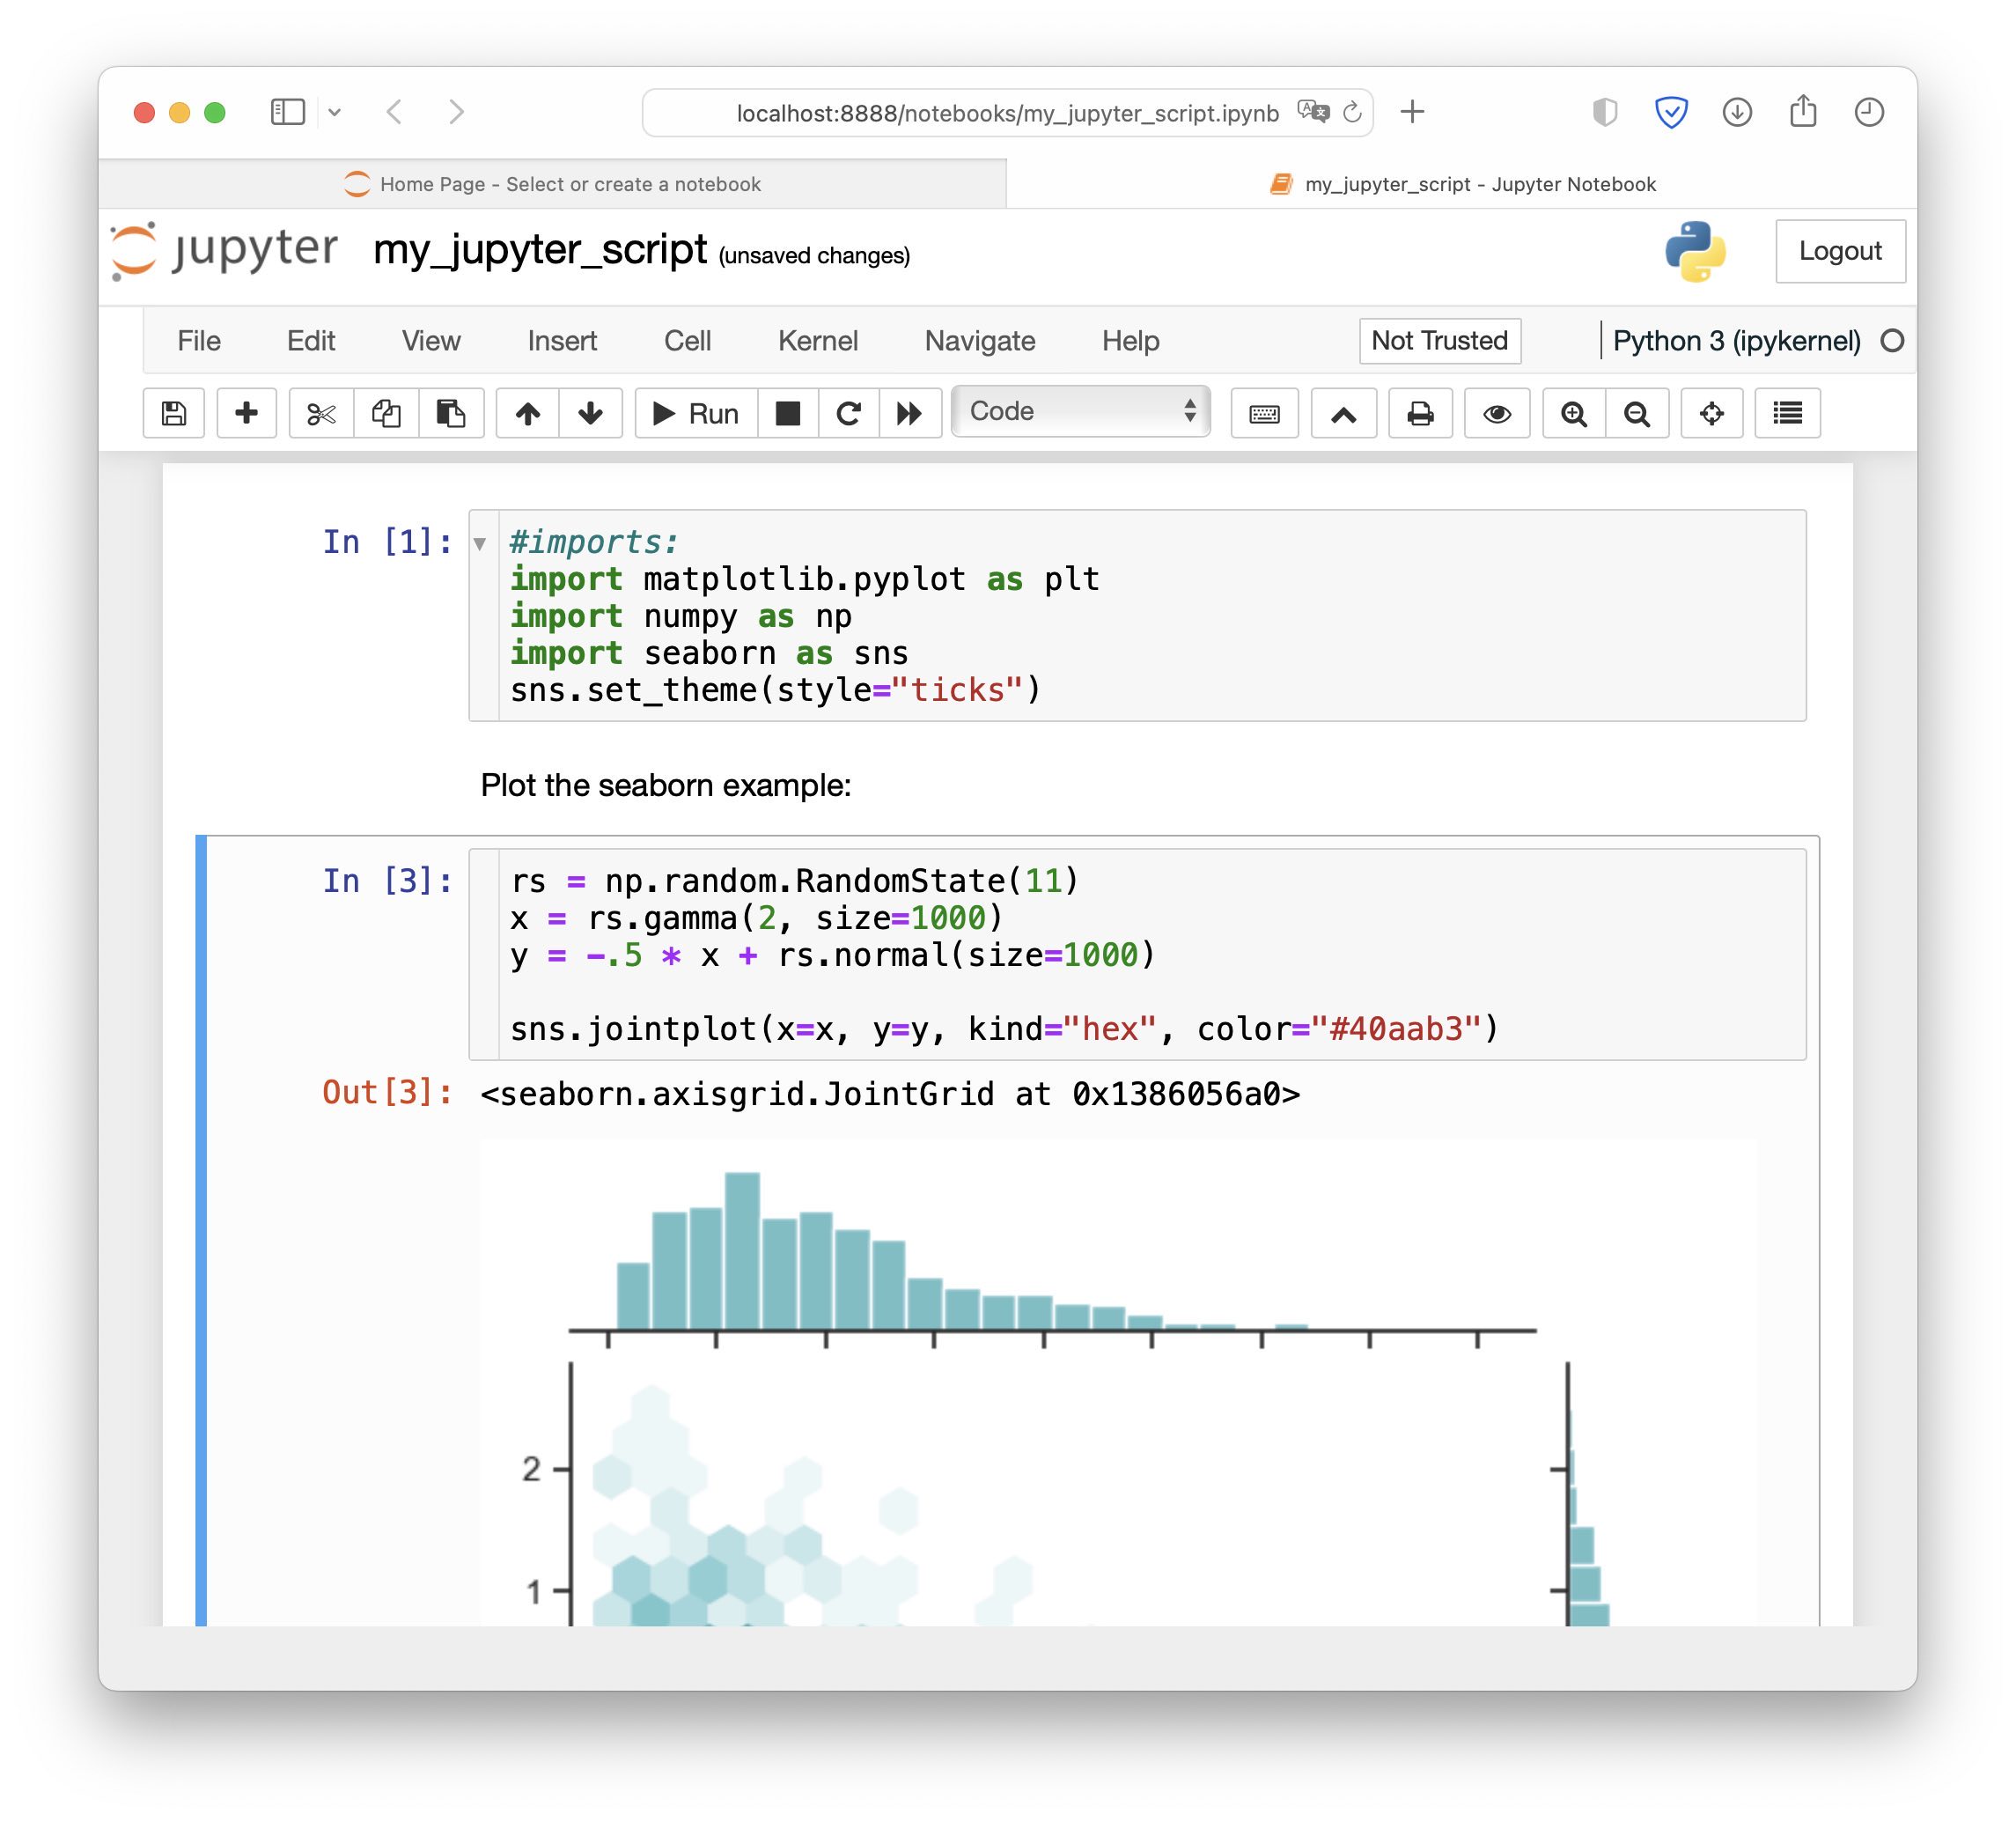 A Jupyter Notebook script.
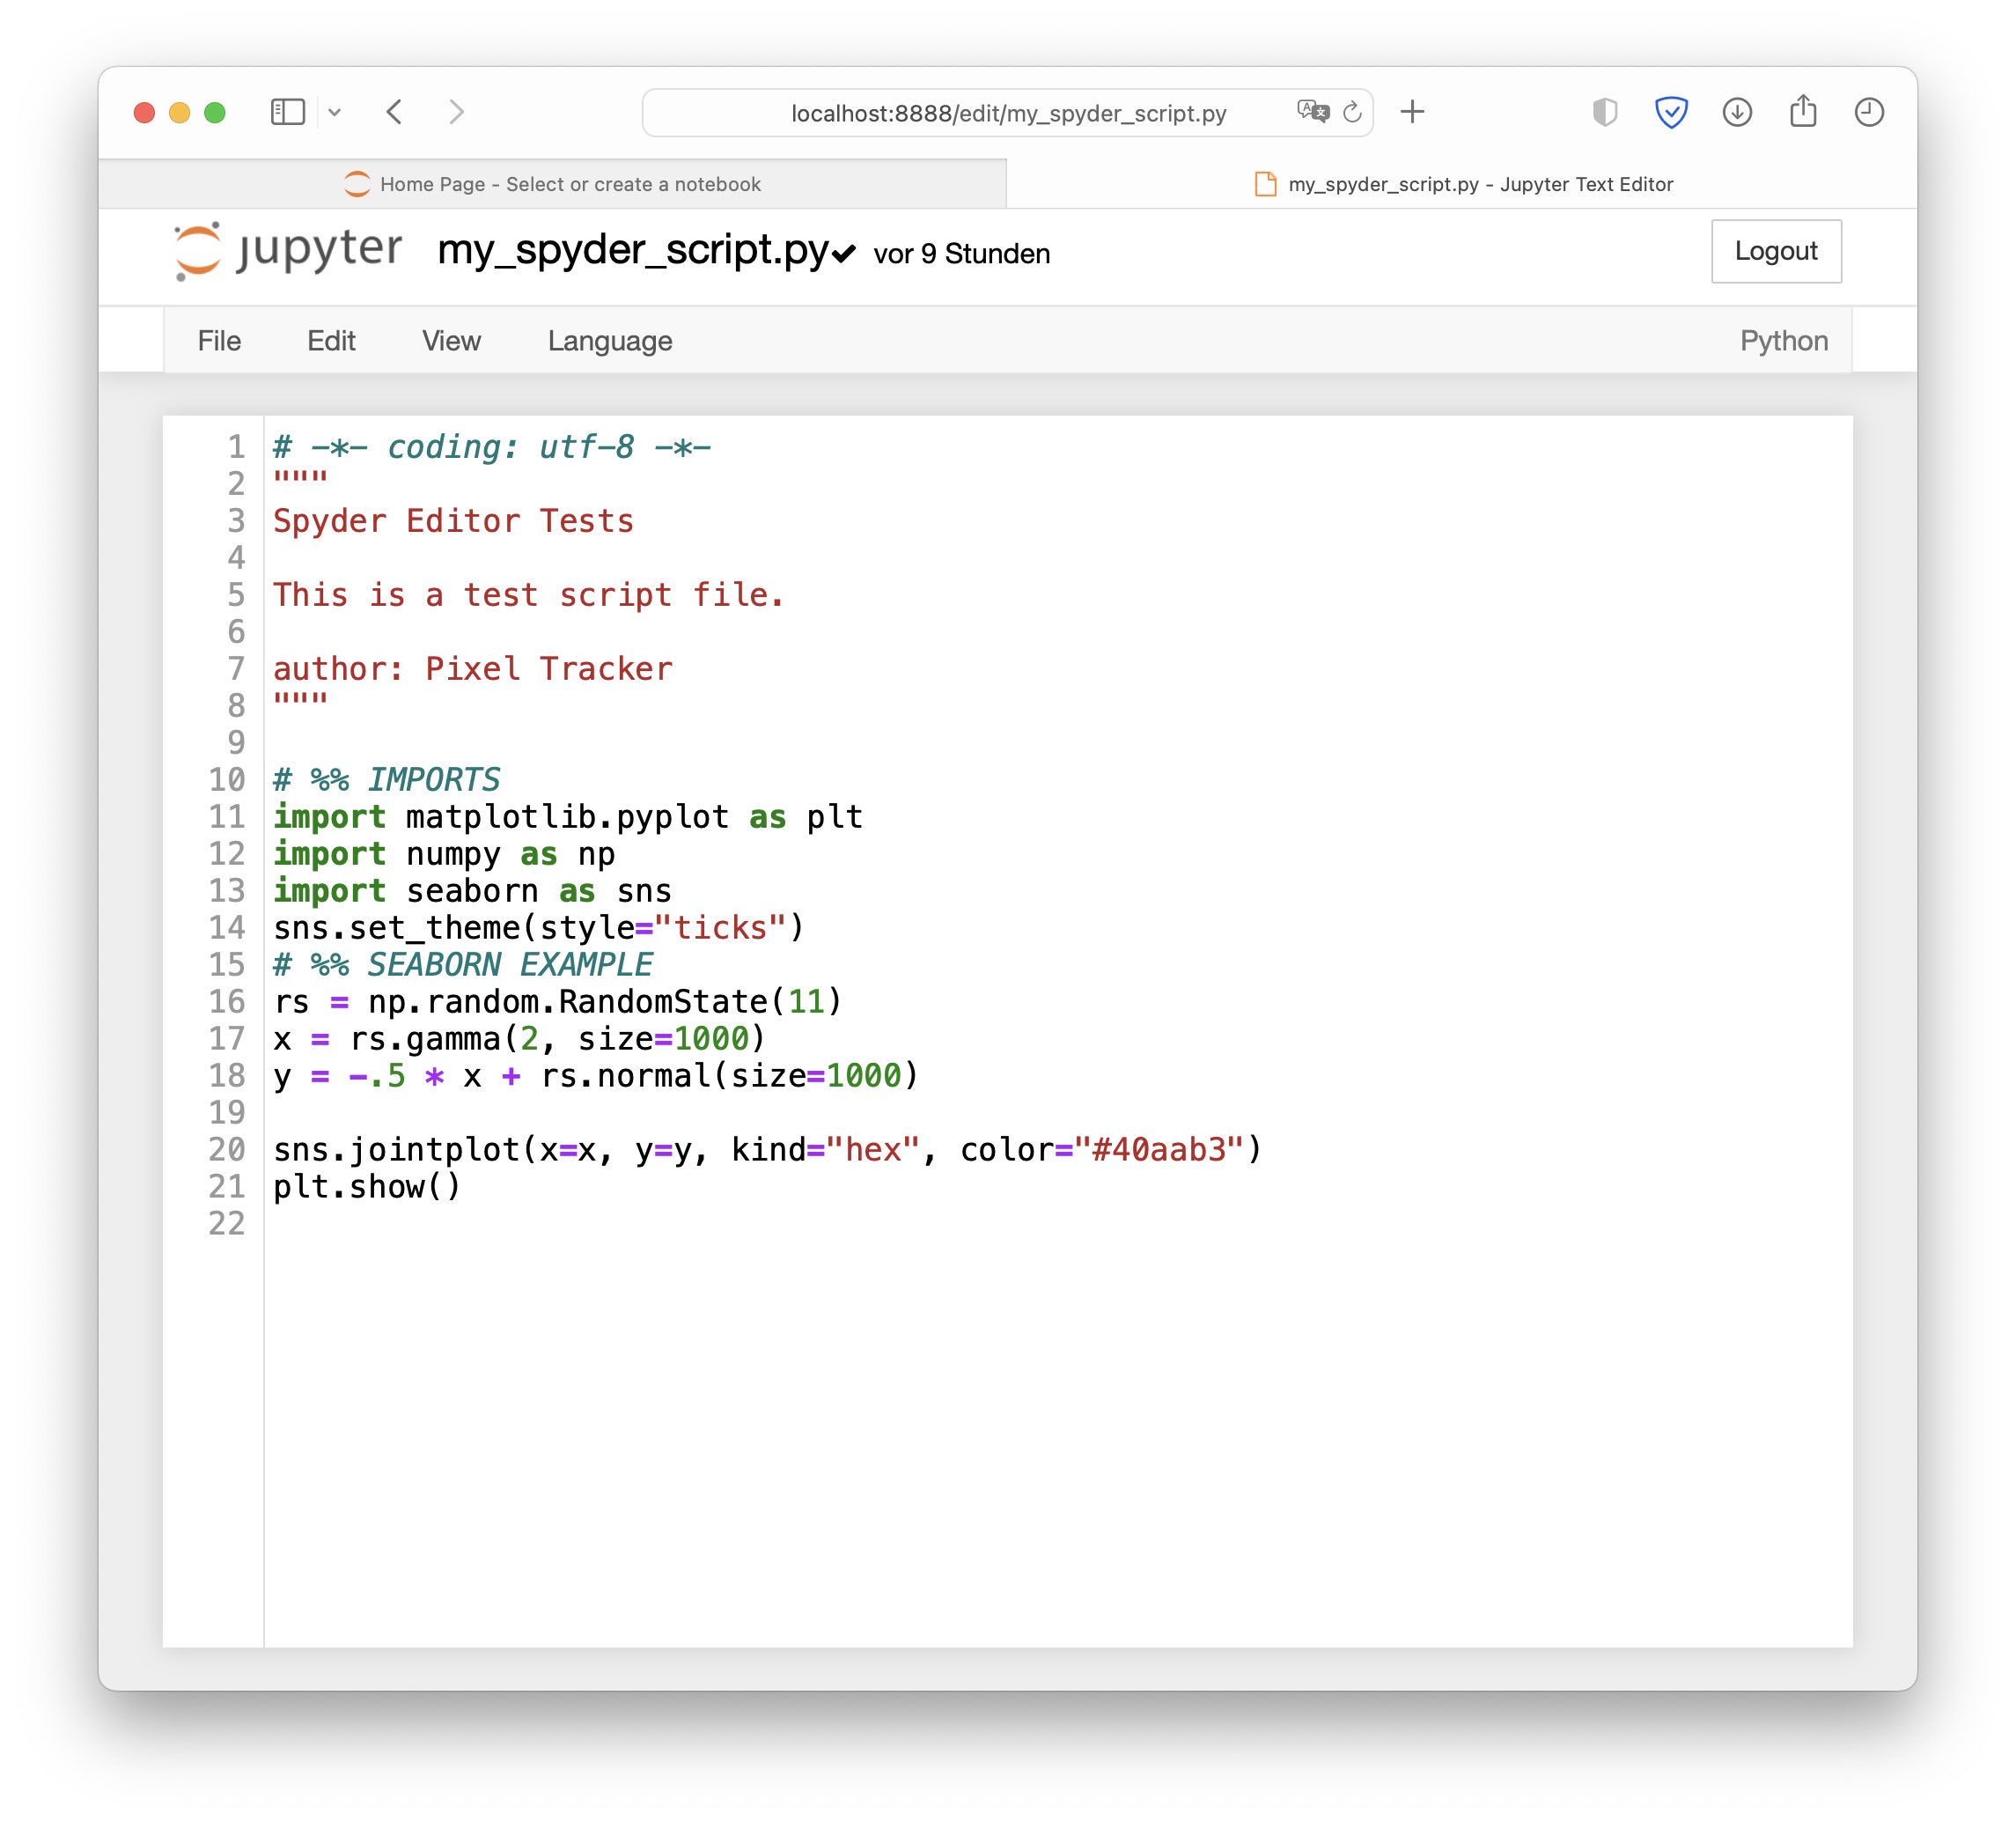 A Python script opened in Jupyter Notebooks. We can edit the script, but we can’t run it from within Jupyter Notebook; we still have to execute the script as shown above.
Quick intro into Jupyter Notebooks
You can find a brief introduction into Jupyter Notebooks in the teaching material.
Alternatively, we can also open a JupyterLabꜛ session:
conda install -y jupyterlab
and to run it, type:
jupyter-lab
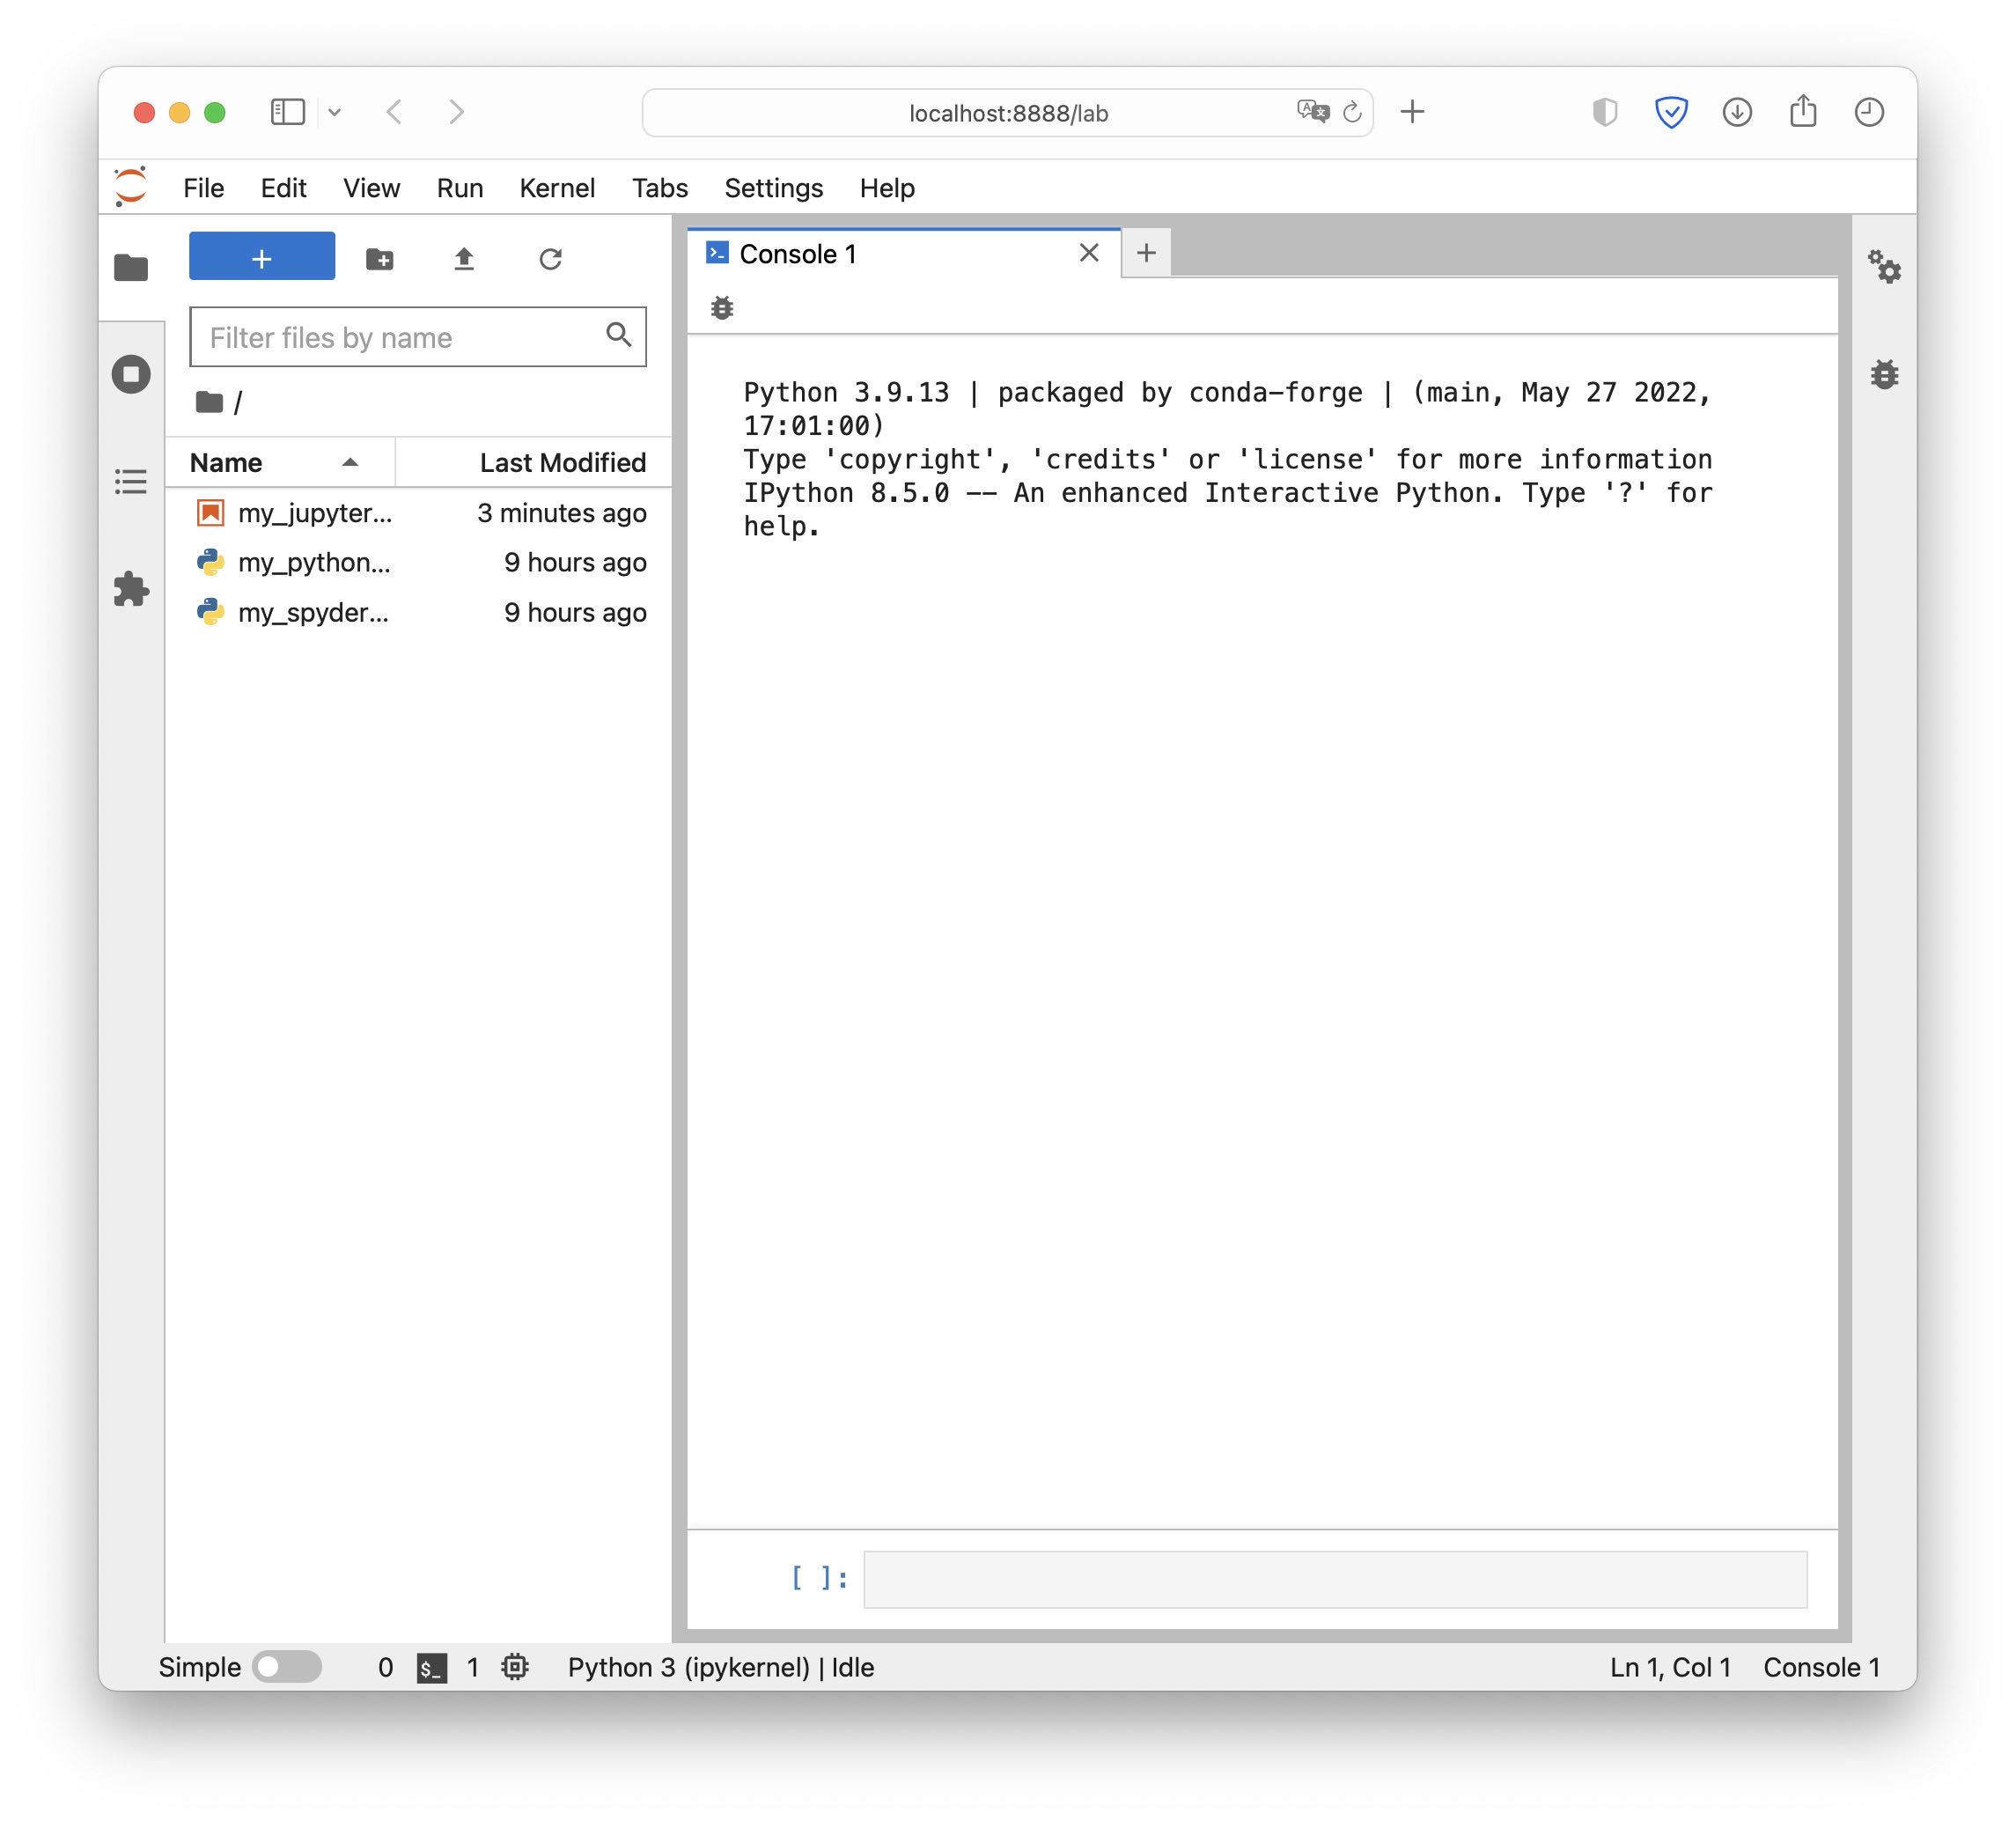 JupyterLab’s start interface. Note the interactive Python consoleꜛ, a fully fleshed IPython console, that is available here. This enables us, to carry out full conda management and run Python scripts without leaving JupyterLab. In contrast to Jupyter Notebooks, we also have the option to arrange windows (console, opened scripts, plots) in tabs.
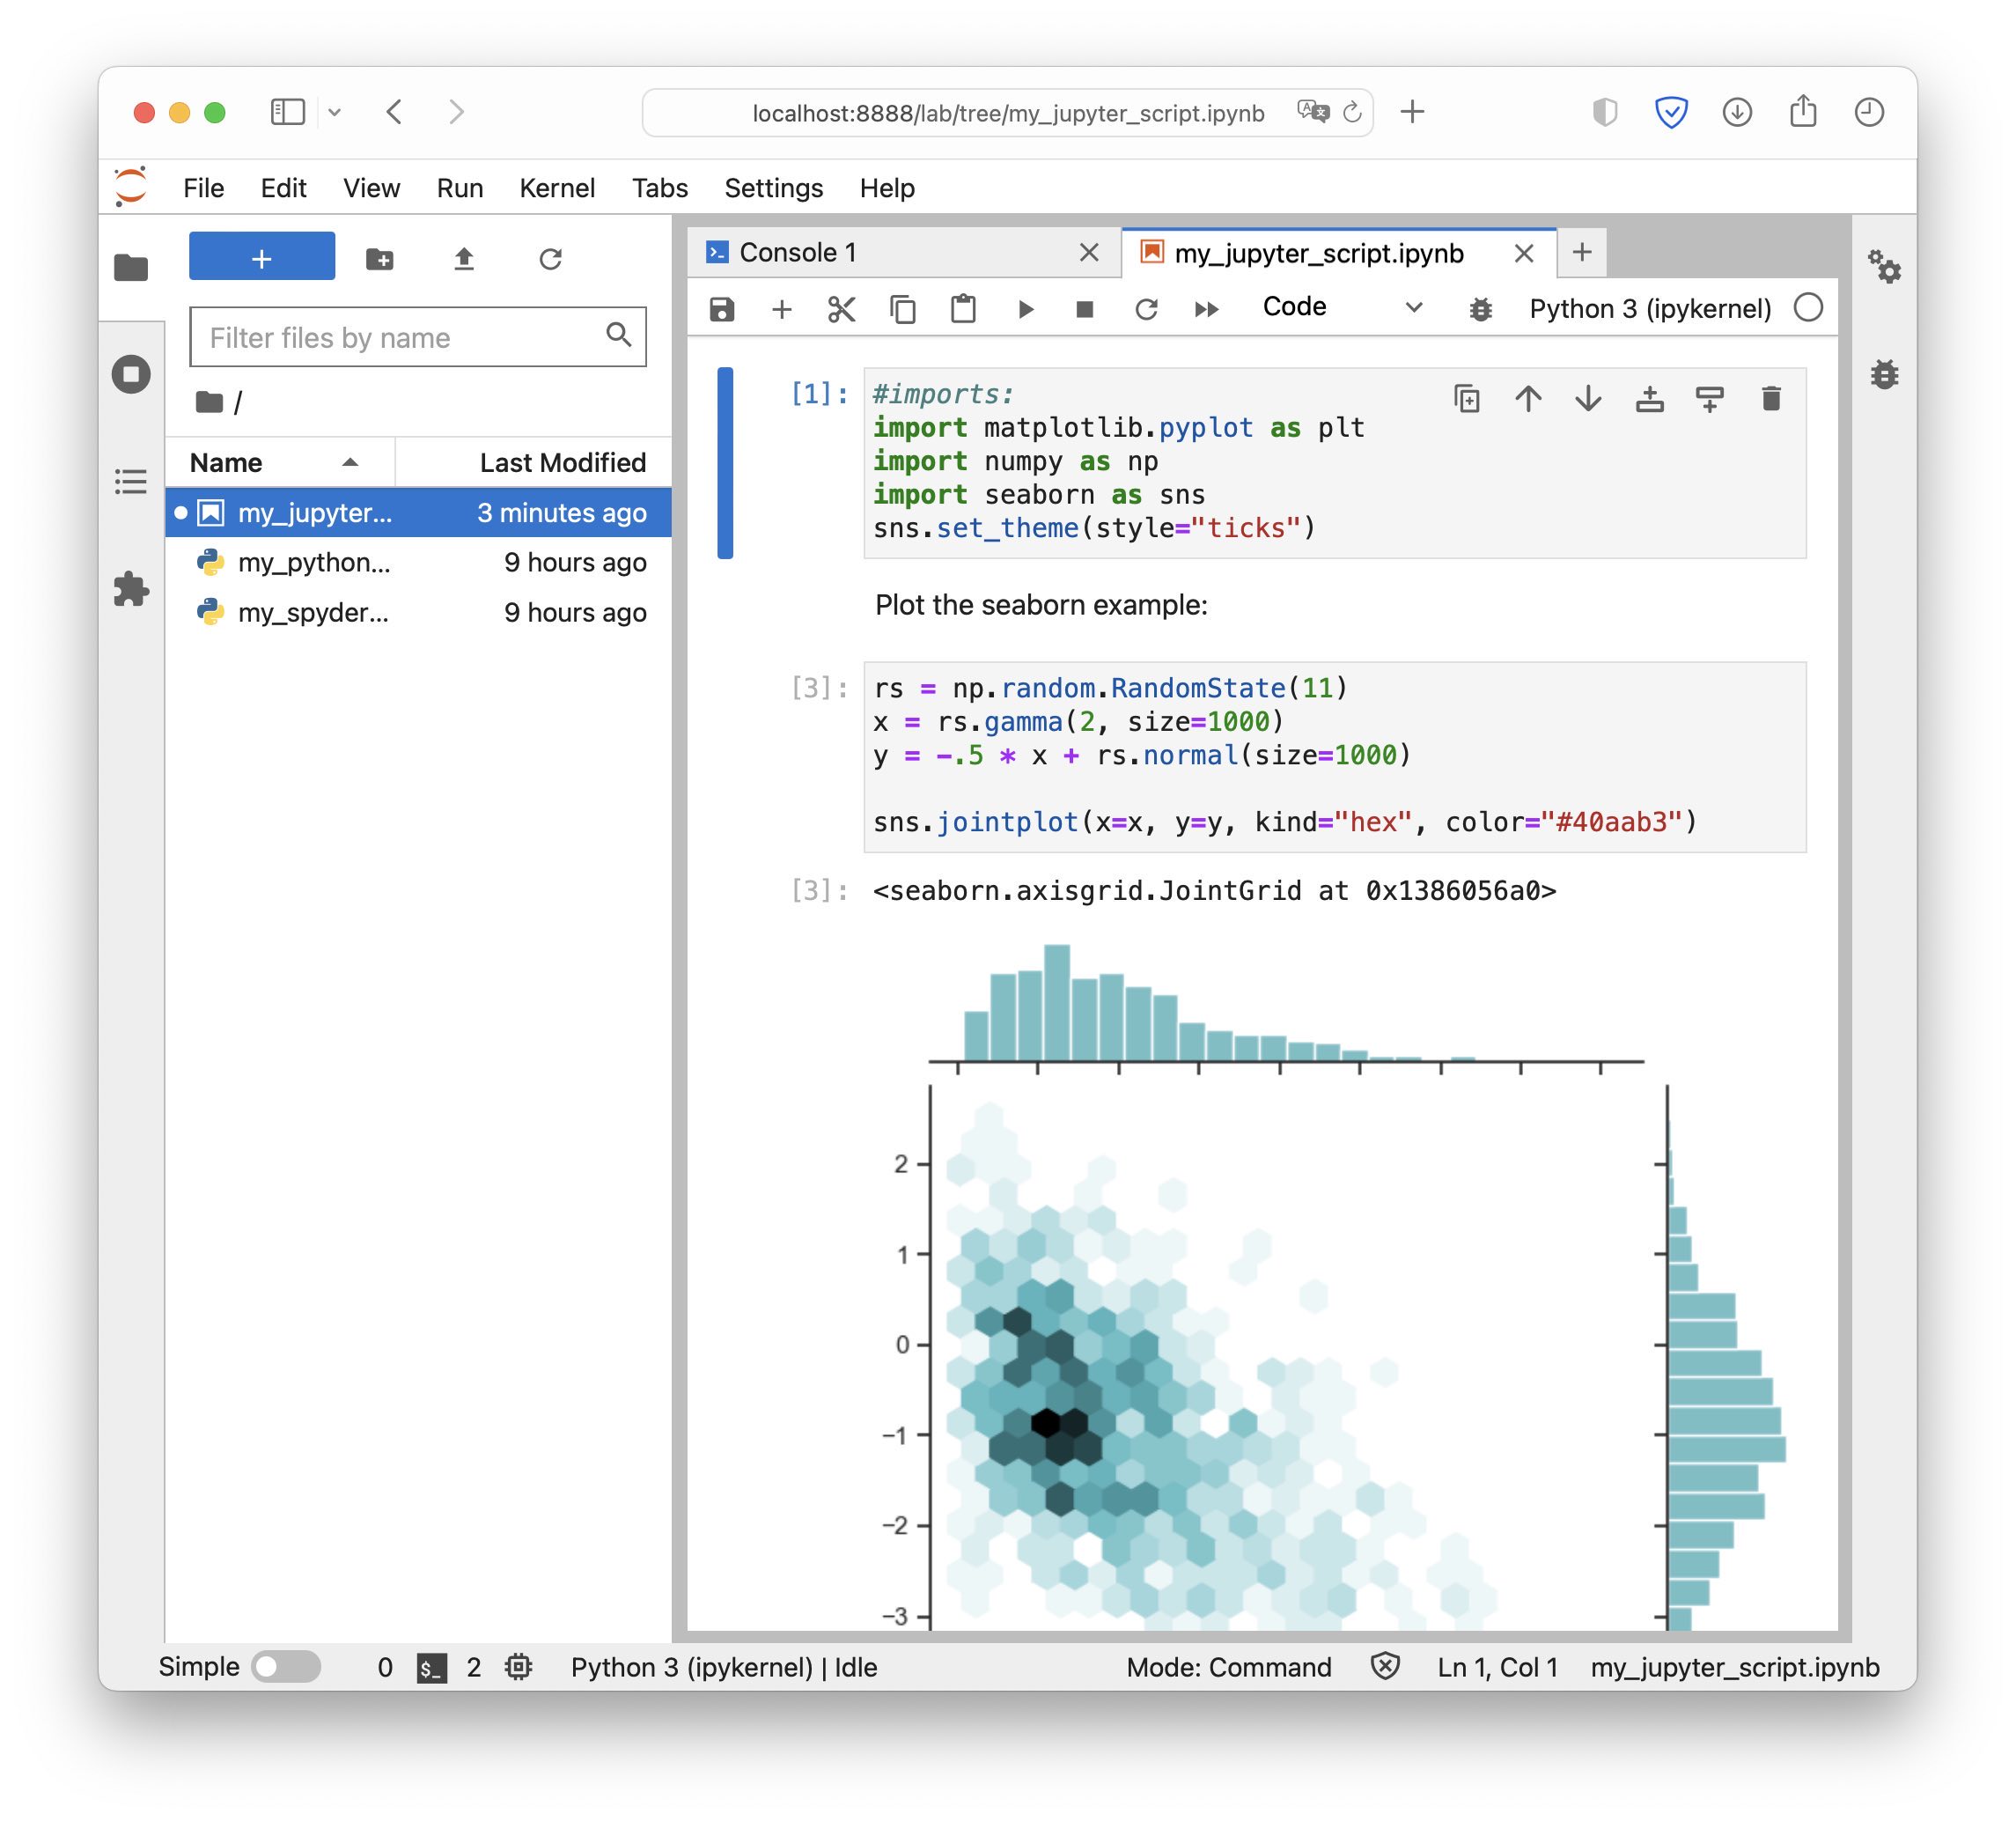 A Jupyter Notebook script opened in JupyterLab.
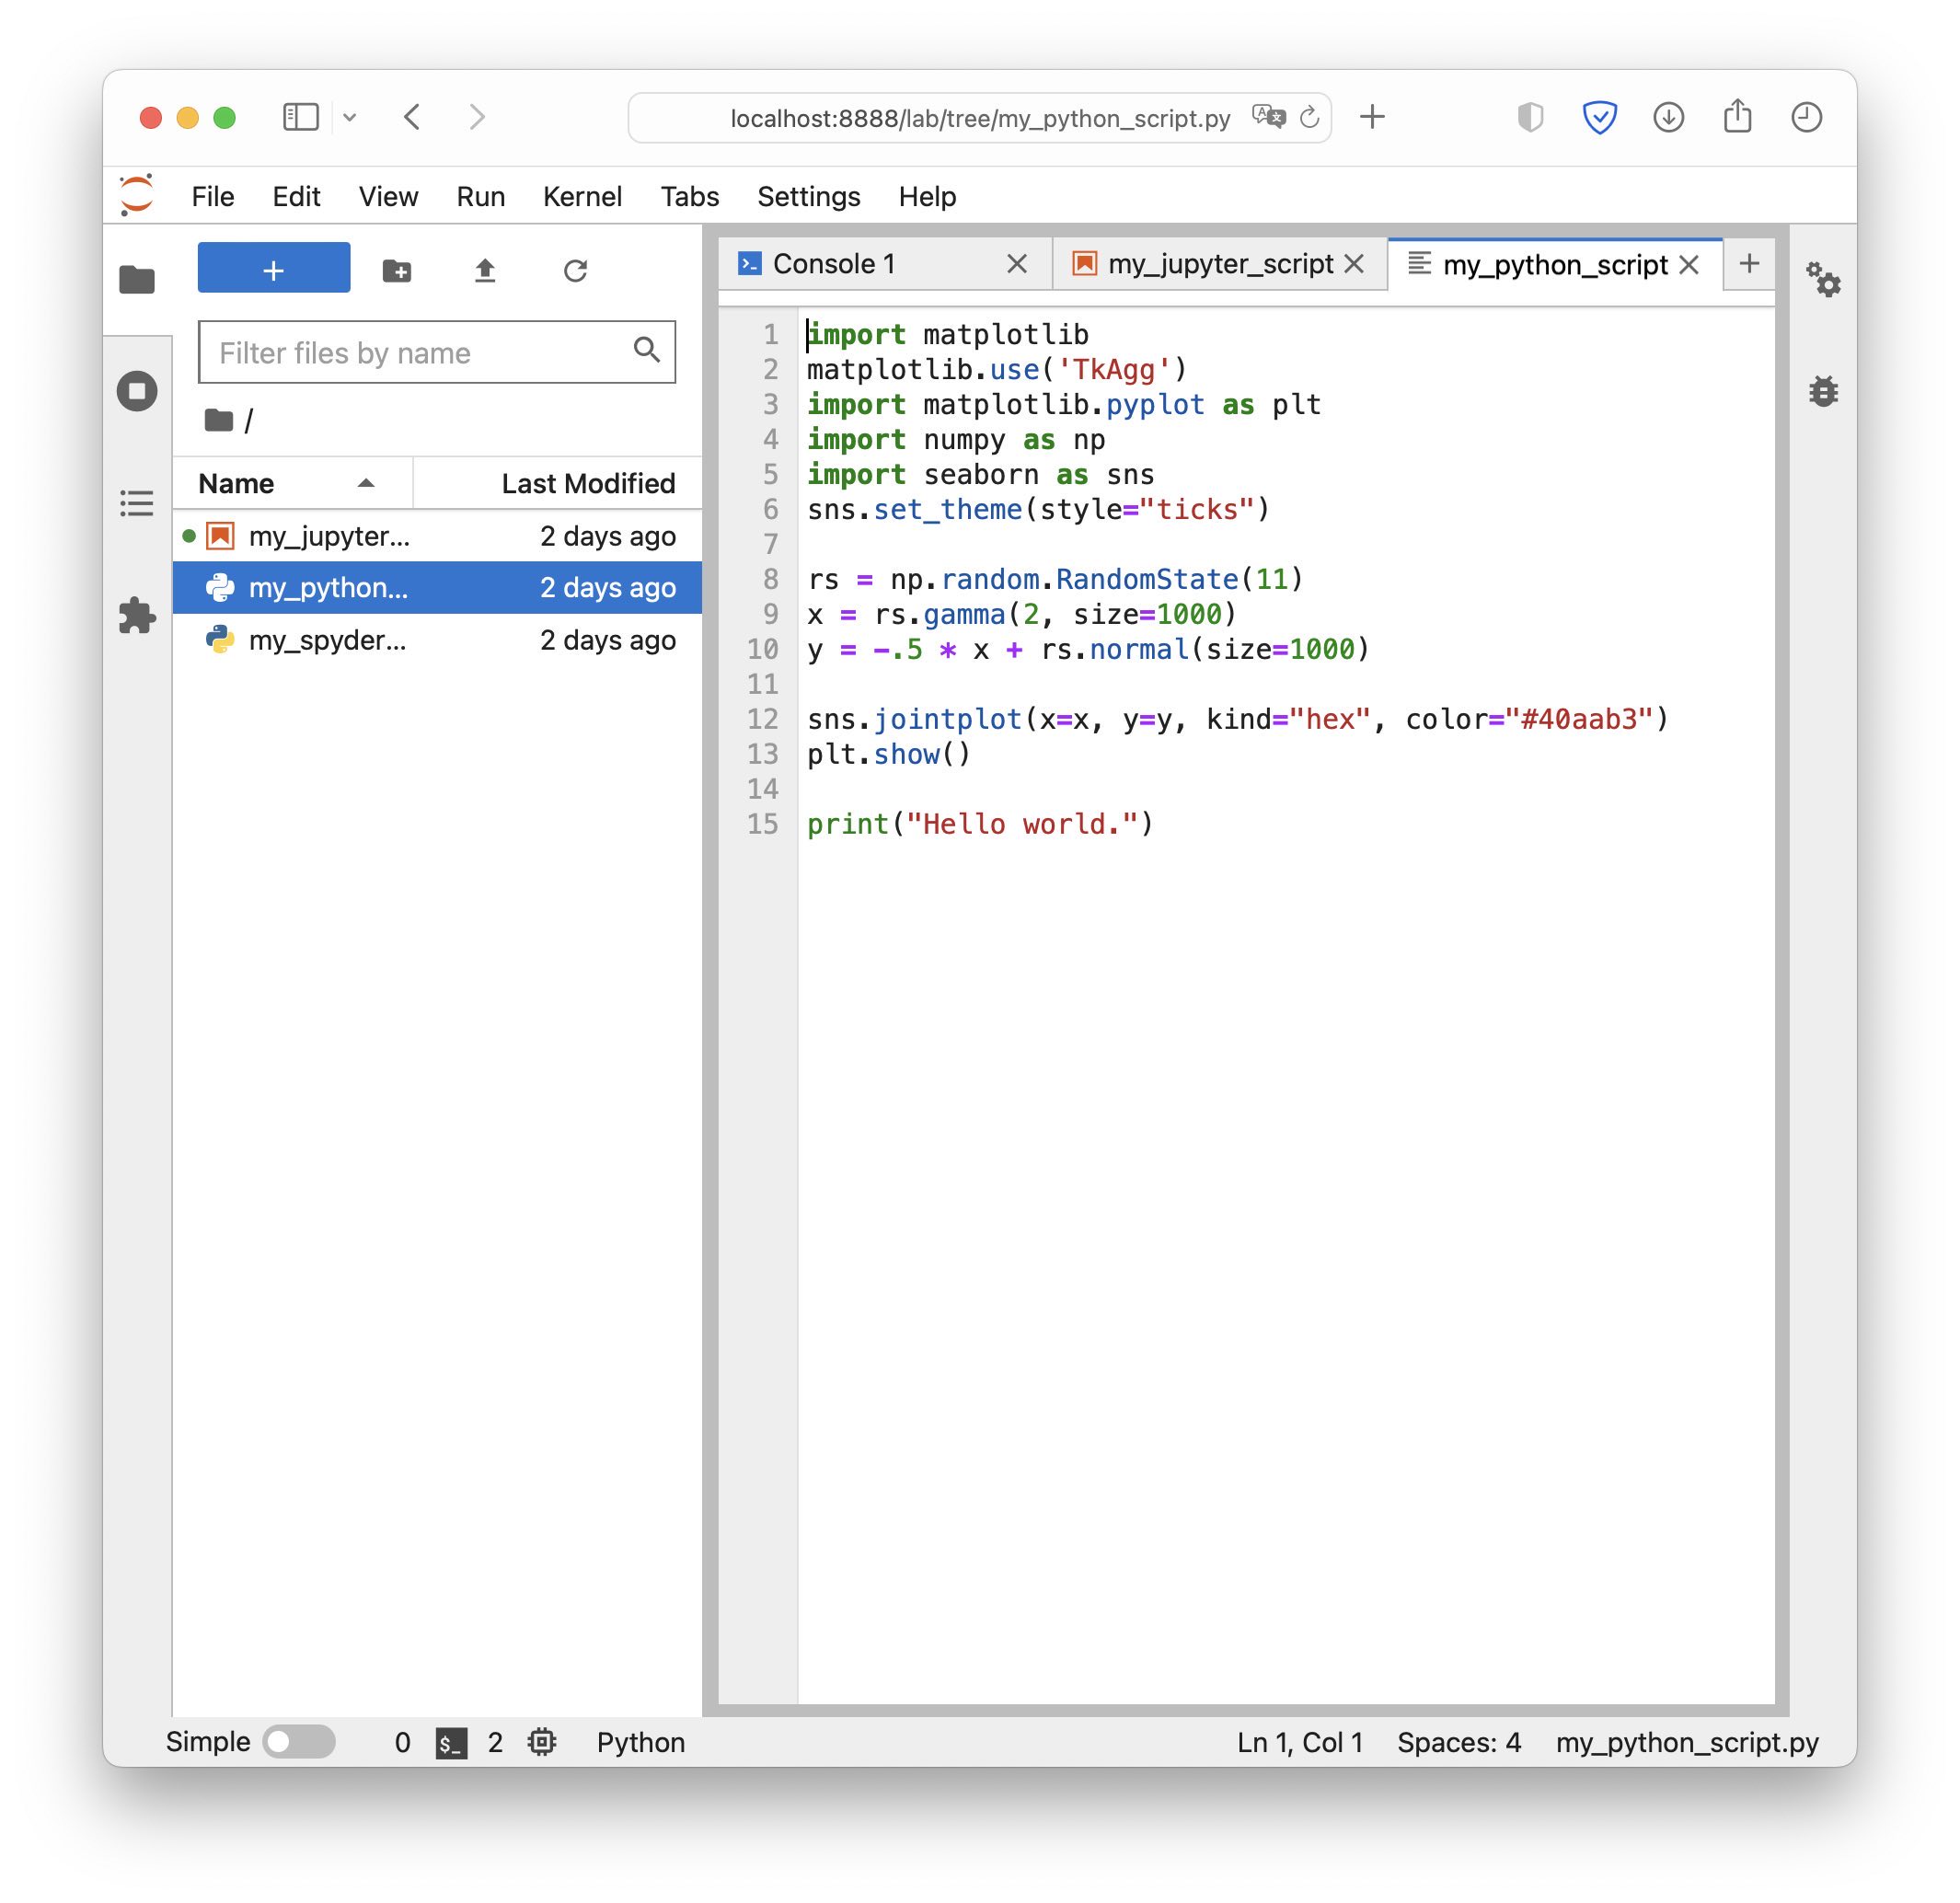 A default Python script opened in JupyterLab. Here, we can edit the script as well, but – unlike Jupyter Notebooks – we can also run it from within JupyterLab via its console:
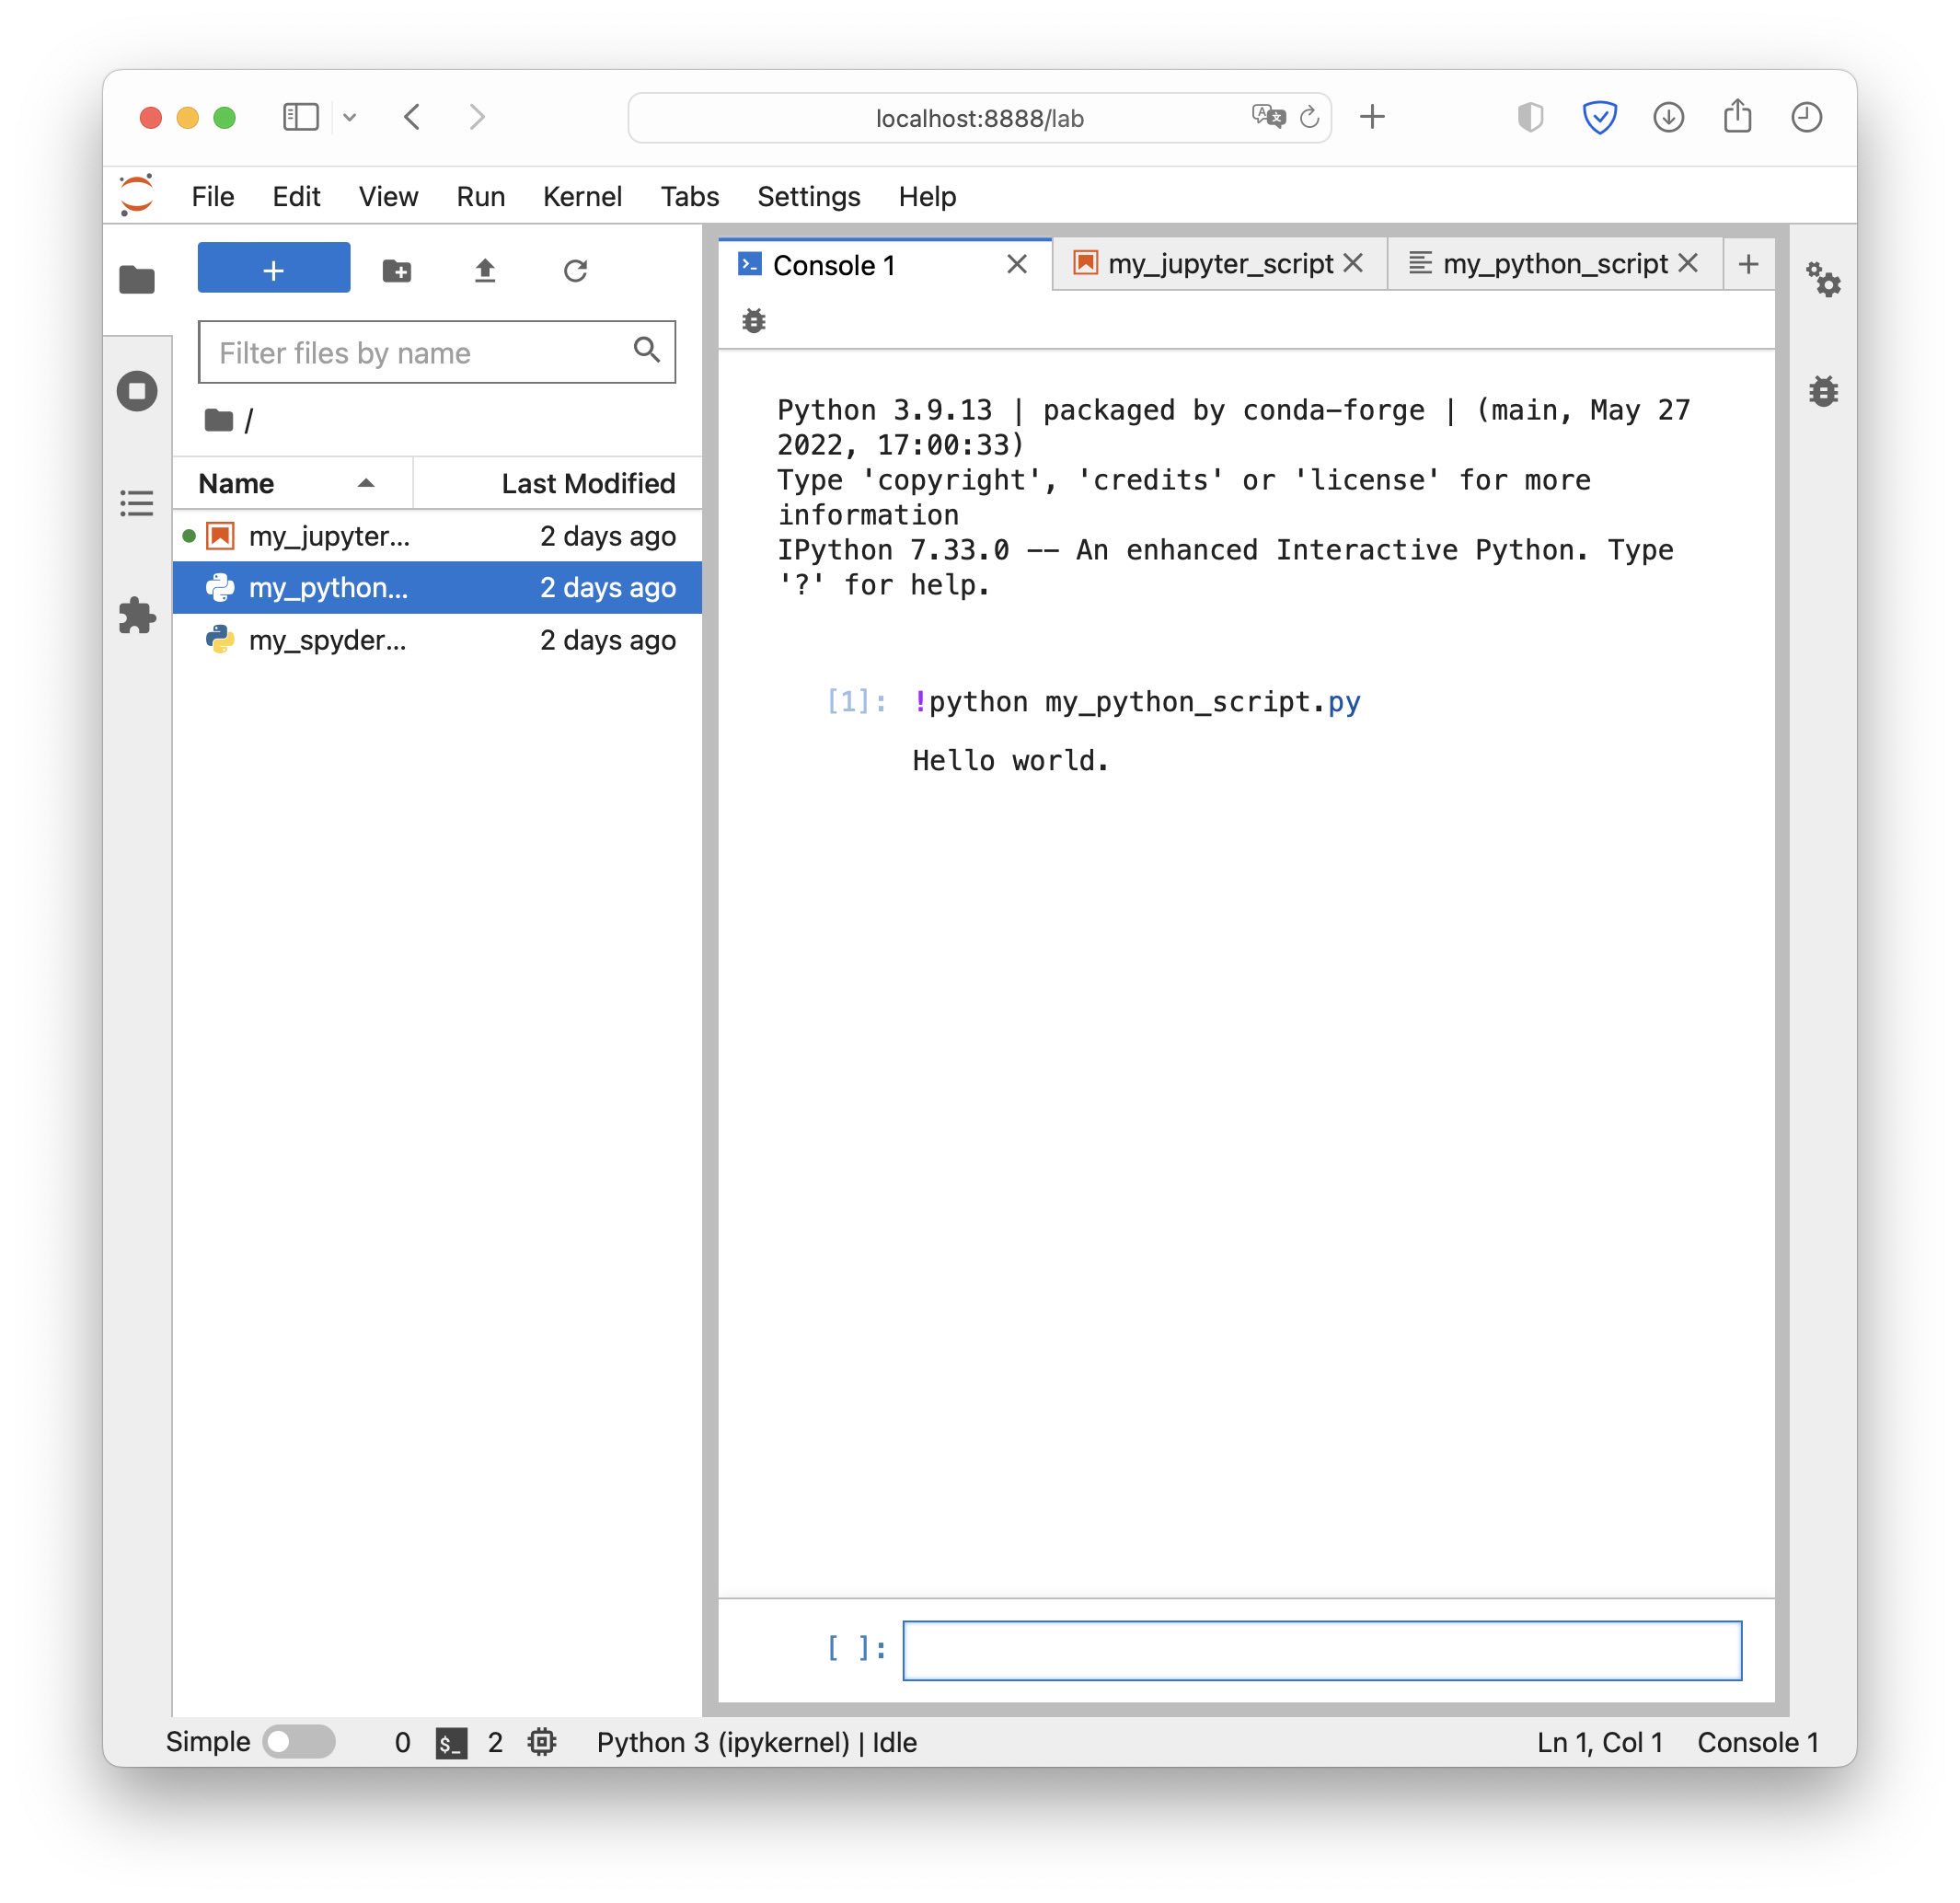 Execute Python scripts in JupyterLab’s console.
To close a Jupyter Notebook session, just click the Quit button in the files view window. To close a JupyterLab session, click in the menu File->Shut Down. Alternatively, turn back to the console, in which you’ve started the session, and press Ctrl+c and confirm the prompt (accounts for both, Jupyter Notebook and JupyterLab).













comments