Changing labels in Napari
In this chapter, you will learn how to change labels in Napari. Changing labels is a common task in image segmentation, where you might want to correct mislabeled regions or merge or split regions. Napari provides several tools to change labels, such as the paint bucket tool or the color picker tool.
Selecting a specific label
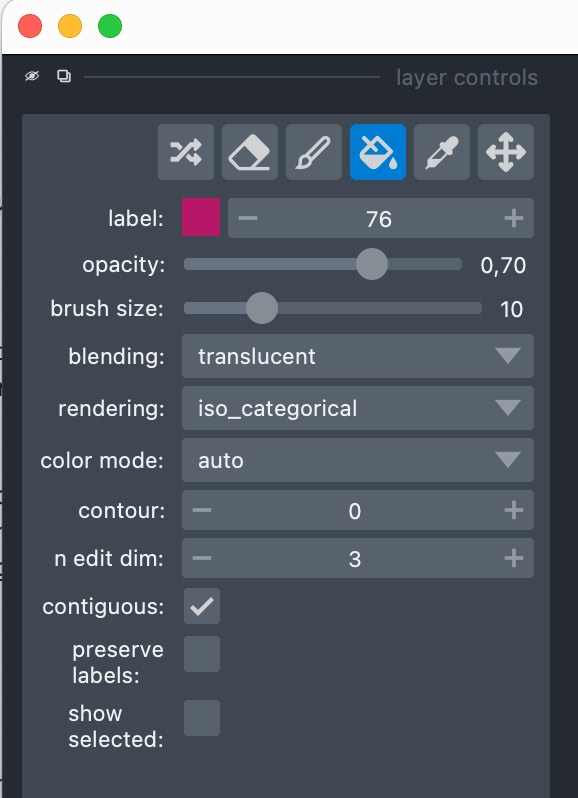
A particular label can be selected either by using the label combobox inside the layers control panel and typing in the desired label number or using the plus/minus buttons, or by selecting the color picker tool and then clicking on a pixel with the desired label in the label layer. When a label is selected, you will see its integer inside the label combobox and the color shown in the thumbnail next to the label combobox. When you hover over a pixel in the label layer, the label of a pixel will also be displayed in the status bar at the bottom of the Napari window.
 The Napari layers control panel. Change the desired label number in the
 label combobox by typing in the value or using the plus/minus buttons. Alternatively, you can select the color picker tool and click on a pixel with the desired label in the image.
Changing labels
You can change the labels of any already labeled pixel in a selected label layer. You can either assign an already given or a new label number. If you want to assign a not yet used label, you can let Napari select the next available label by clicking M. This will guarantee that you are using a label that hasn’t been used before.
To change a label, just change the desired (new) label number in the label combobox in the layers control panel (or press M) and then use the fill bucket tool to assign the new label to previously labeled pixels.
If you are working with 3D images, i.e., images with multiple z-slices, you can also change labels in each z-slice at once. To do so, change the n edit dim in the layers control panel to 3. When you now click on a pixel in the label layer using the paint bucket tool, the label will be changed in all z-slices at once.
Checking the currently assigned labels
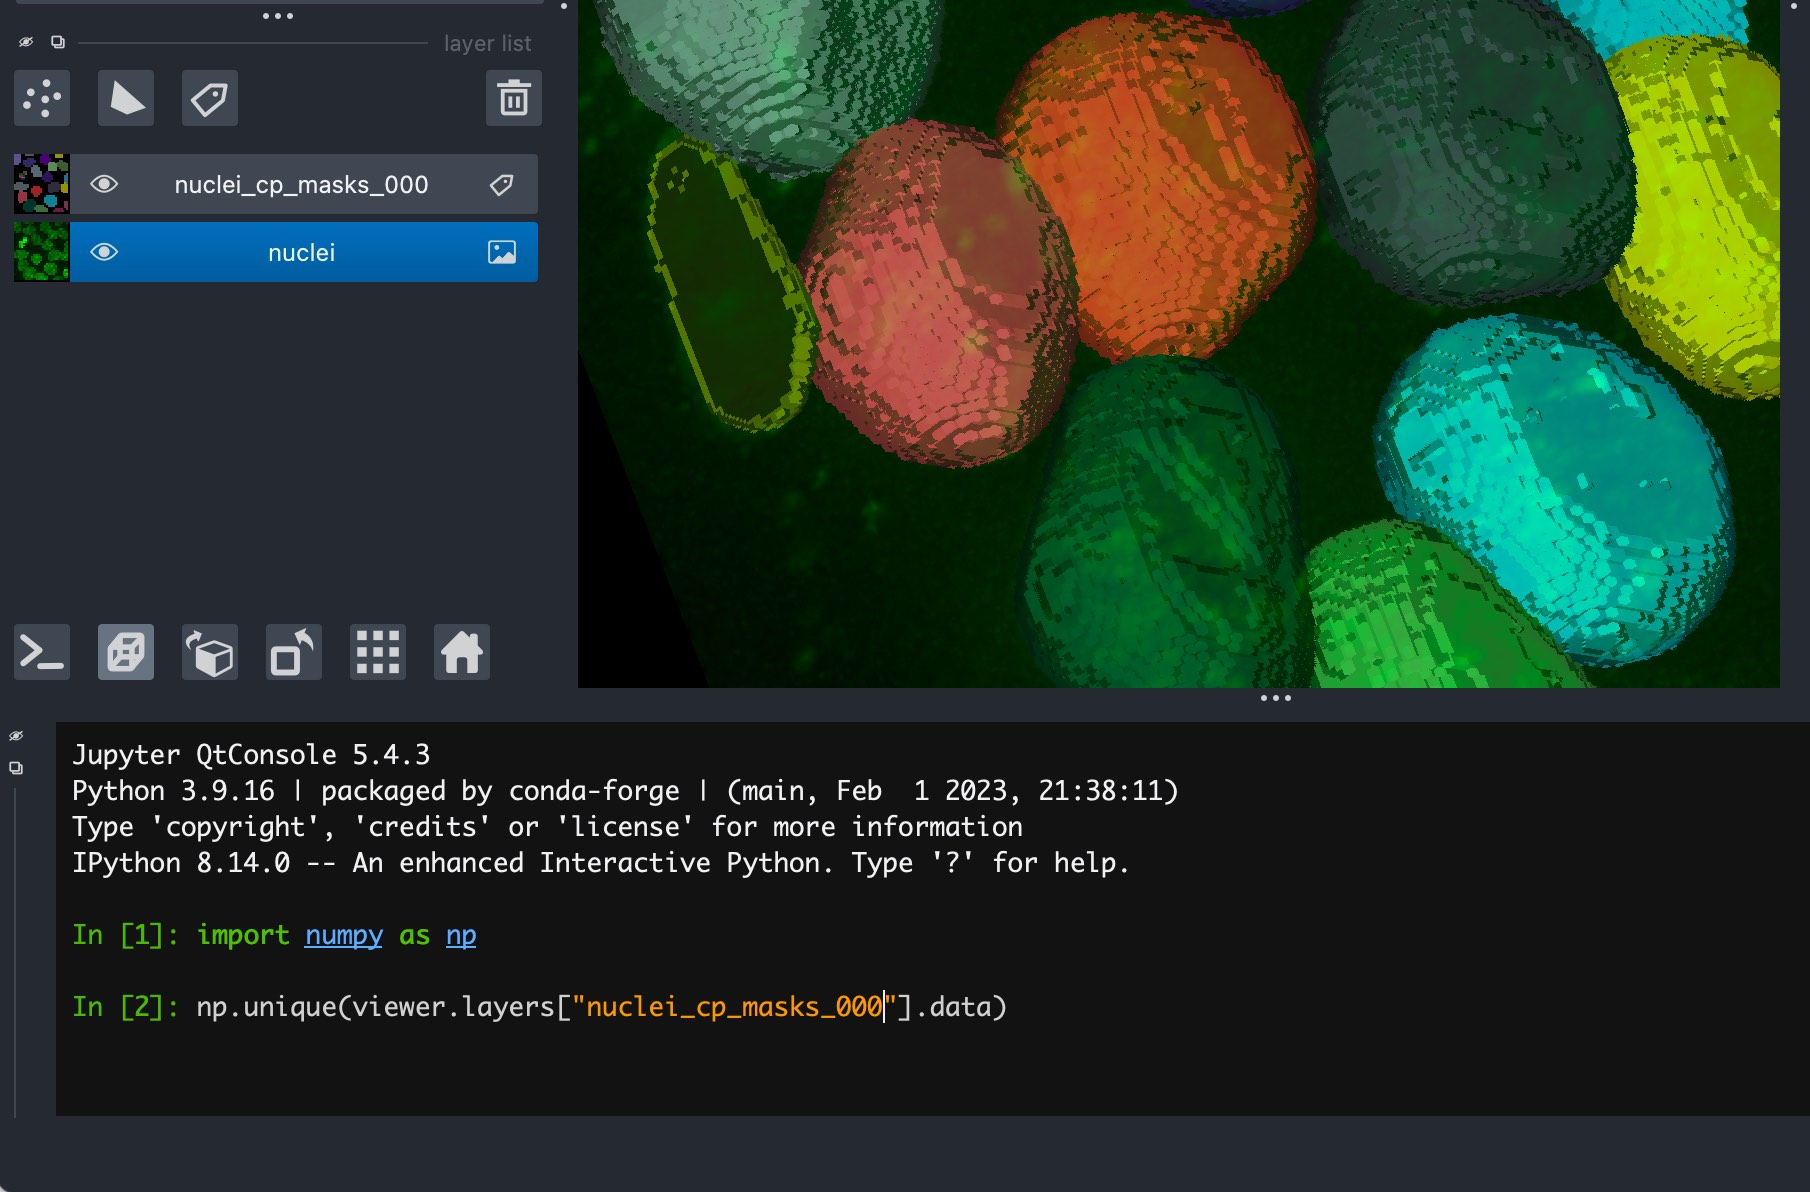
In order to check, which labels are currently assigned to a specific image layer, you can use the Napari built-in console. To open the console, just click Window -> console in the Napari menu. Alternatively, you can also click on the console icon in the Napari toolbar (lower left panel). In the console, type the following commands:
import numpy as np
np.unique(viewer.layers["LAYER_NAME"].data)
where LAYER_NAME is the name of the layer you want to check. The command will return a list of all unique labels assigned to the layer:

 The Napari console and the corresponding commands (upper image) to check the currently assigned labels in the corresponding layer (bottom image).
Alternatively, you can also use feature extraction methods described in the “Image segmentation and feature extraction” chapter:
 Feature table of the extracted properties for each segmented cell. In the “label” column, you can see all currently assigned labels.